Guide: Modding a Game Boy Color
Upgrade your console with a new shell and IPS screen
 Mod your Game Boy Color with a new IPS screen and a shell of your choice.
Guide: Modding a Game Boy Color
In this guide, you will learn step by step how to upgrade a Game Boy Color with a new shell and a modern IPS screen. This will give your console a fresh look and an enhanced user experience.
Required Materials
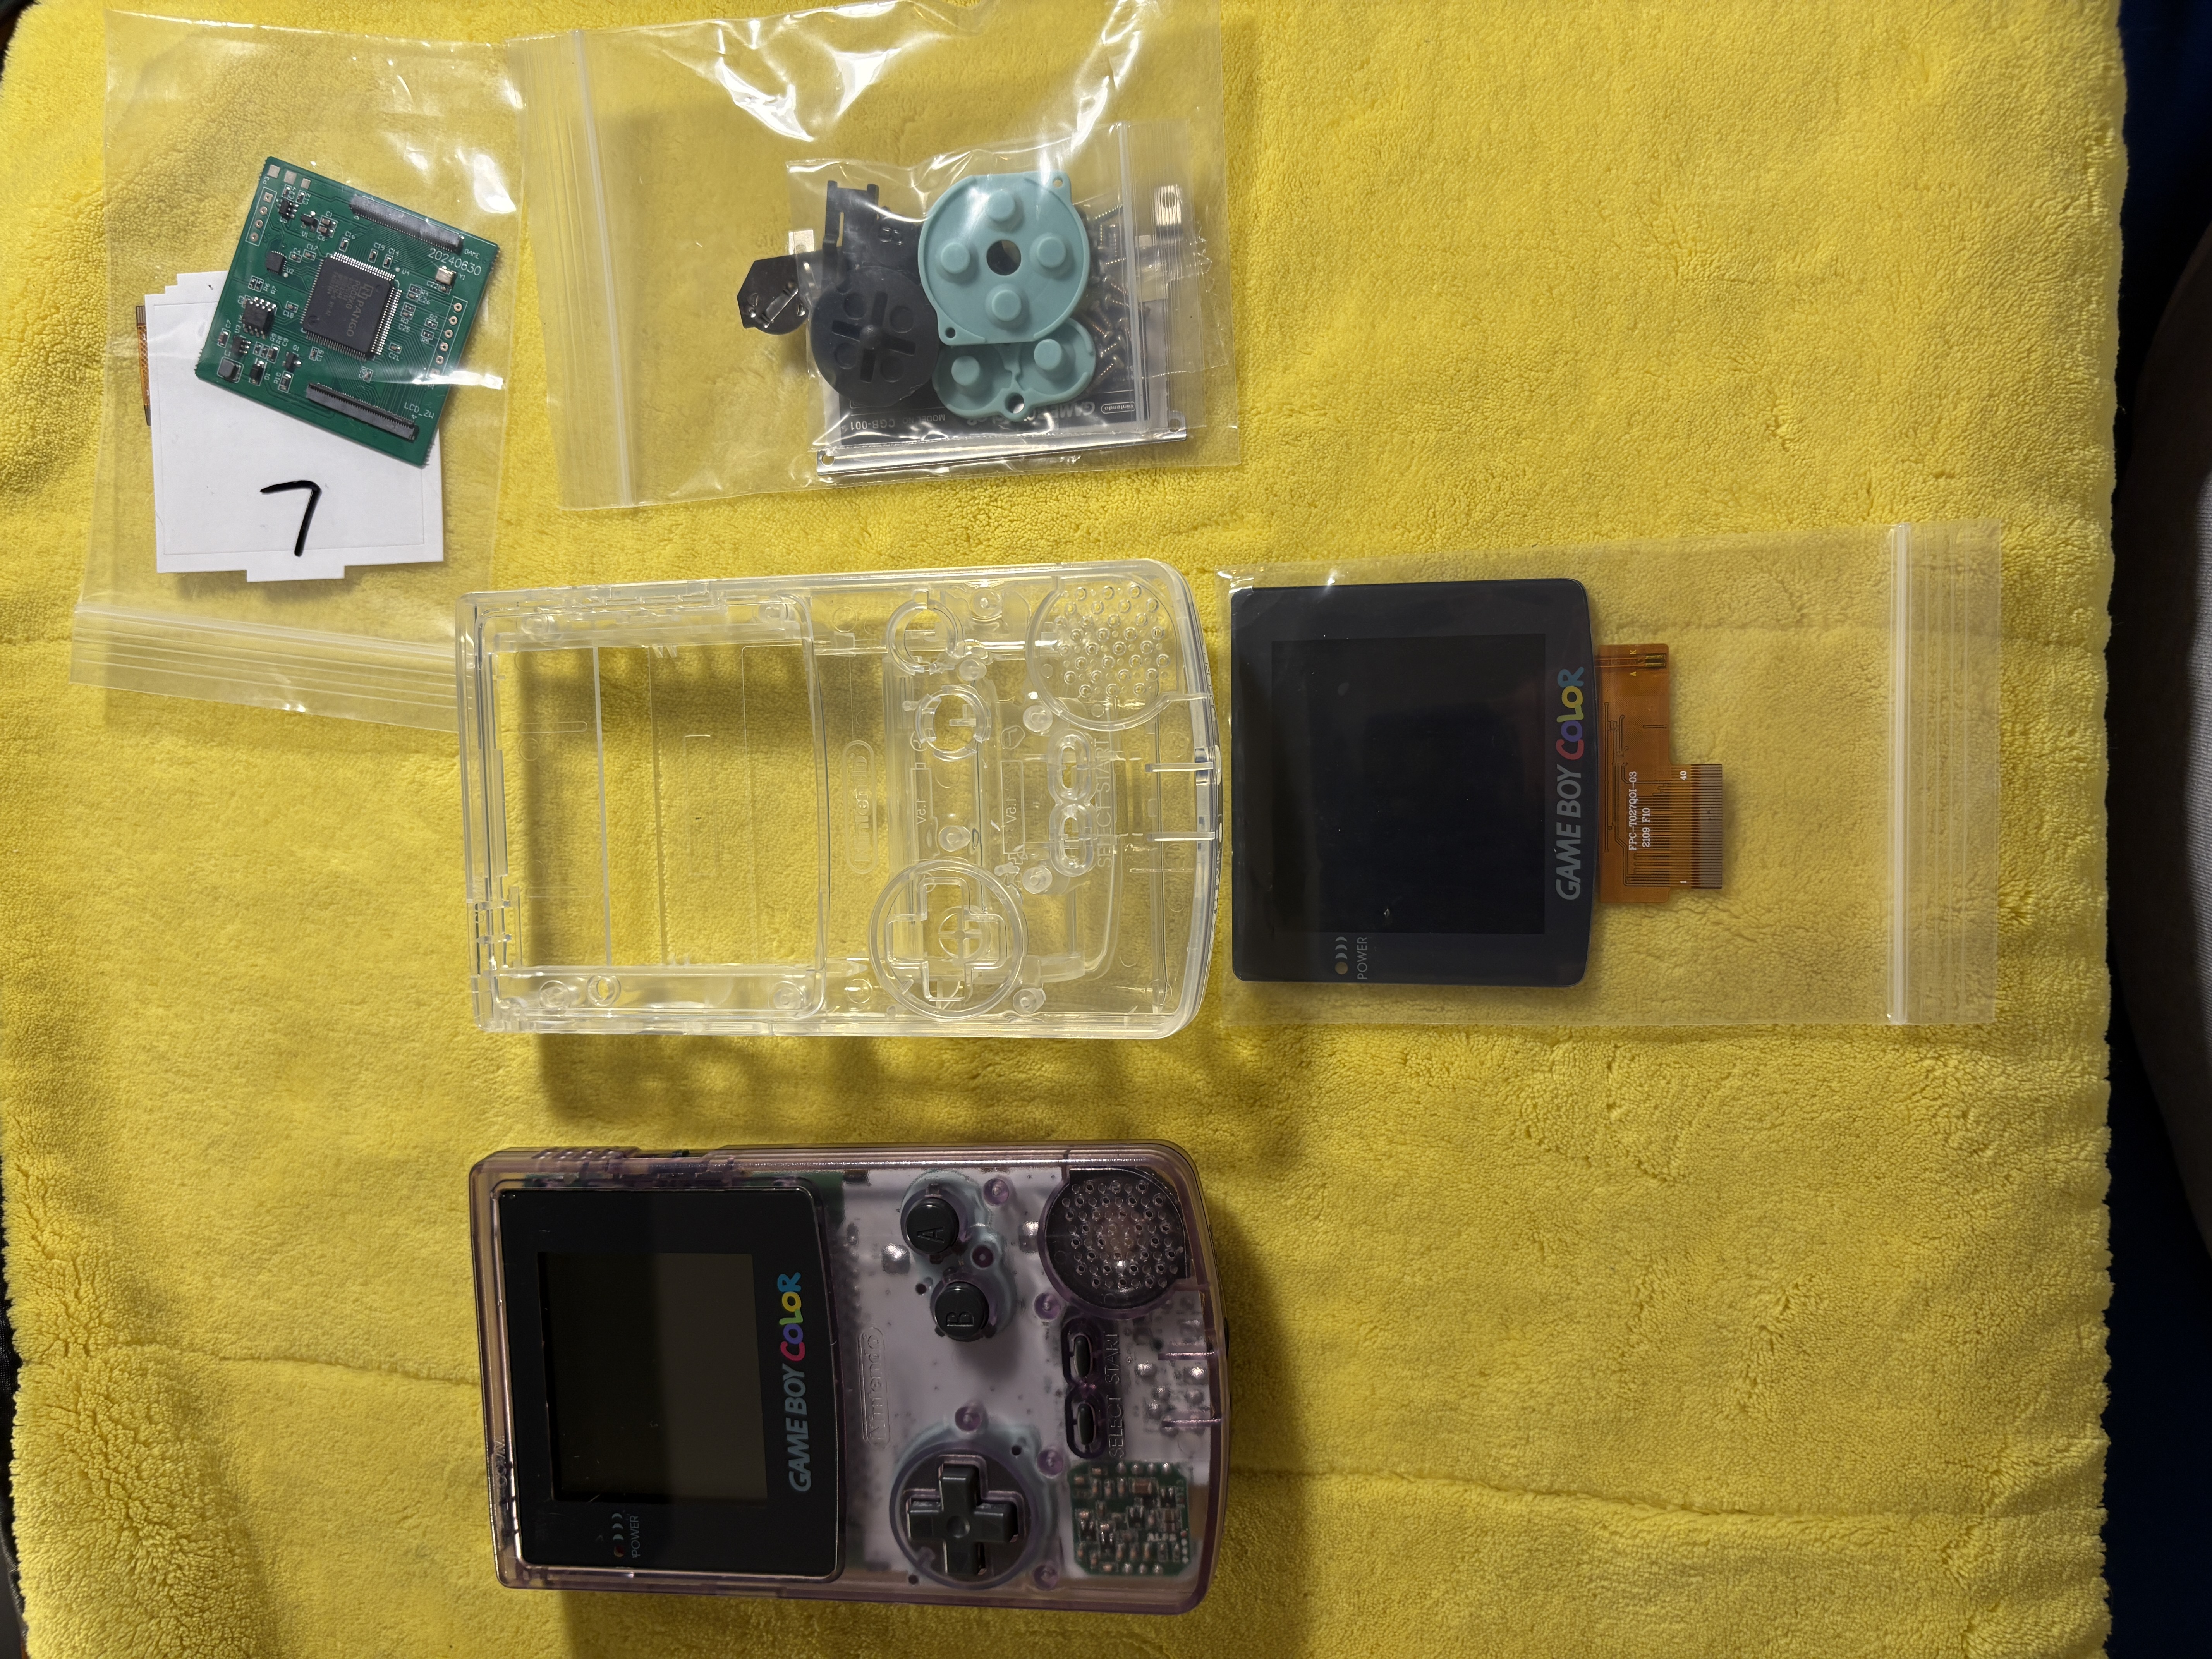
- A donor Game Boy Color
- Batteries
- A game to test
- A mod kit (IPS screen and new shell in your desired colors)
-
- I Got mine here :None affiliate link
- Screwdriver set (including tri-wing screwdriver)
- Isopropyl alcohol (for cleaning)
- Cotton swabs
- A soft surface to work on
Tips Before You Start
- Crosshead screws are all intended for the interior of the Game Boy.
- Tri-wing screws, or screws with three sides, are always for the shell of the Game Boy.
- Avoid touching the inside of the new shell as much as possible. If you do, clean it with alcohol to prevent fingerprints from being visible inside your beautiful new case.
Step 1: Test the Original Game Boy Color
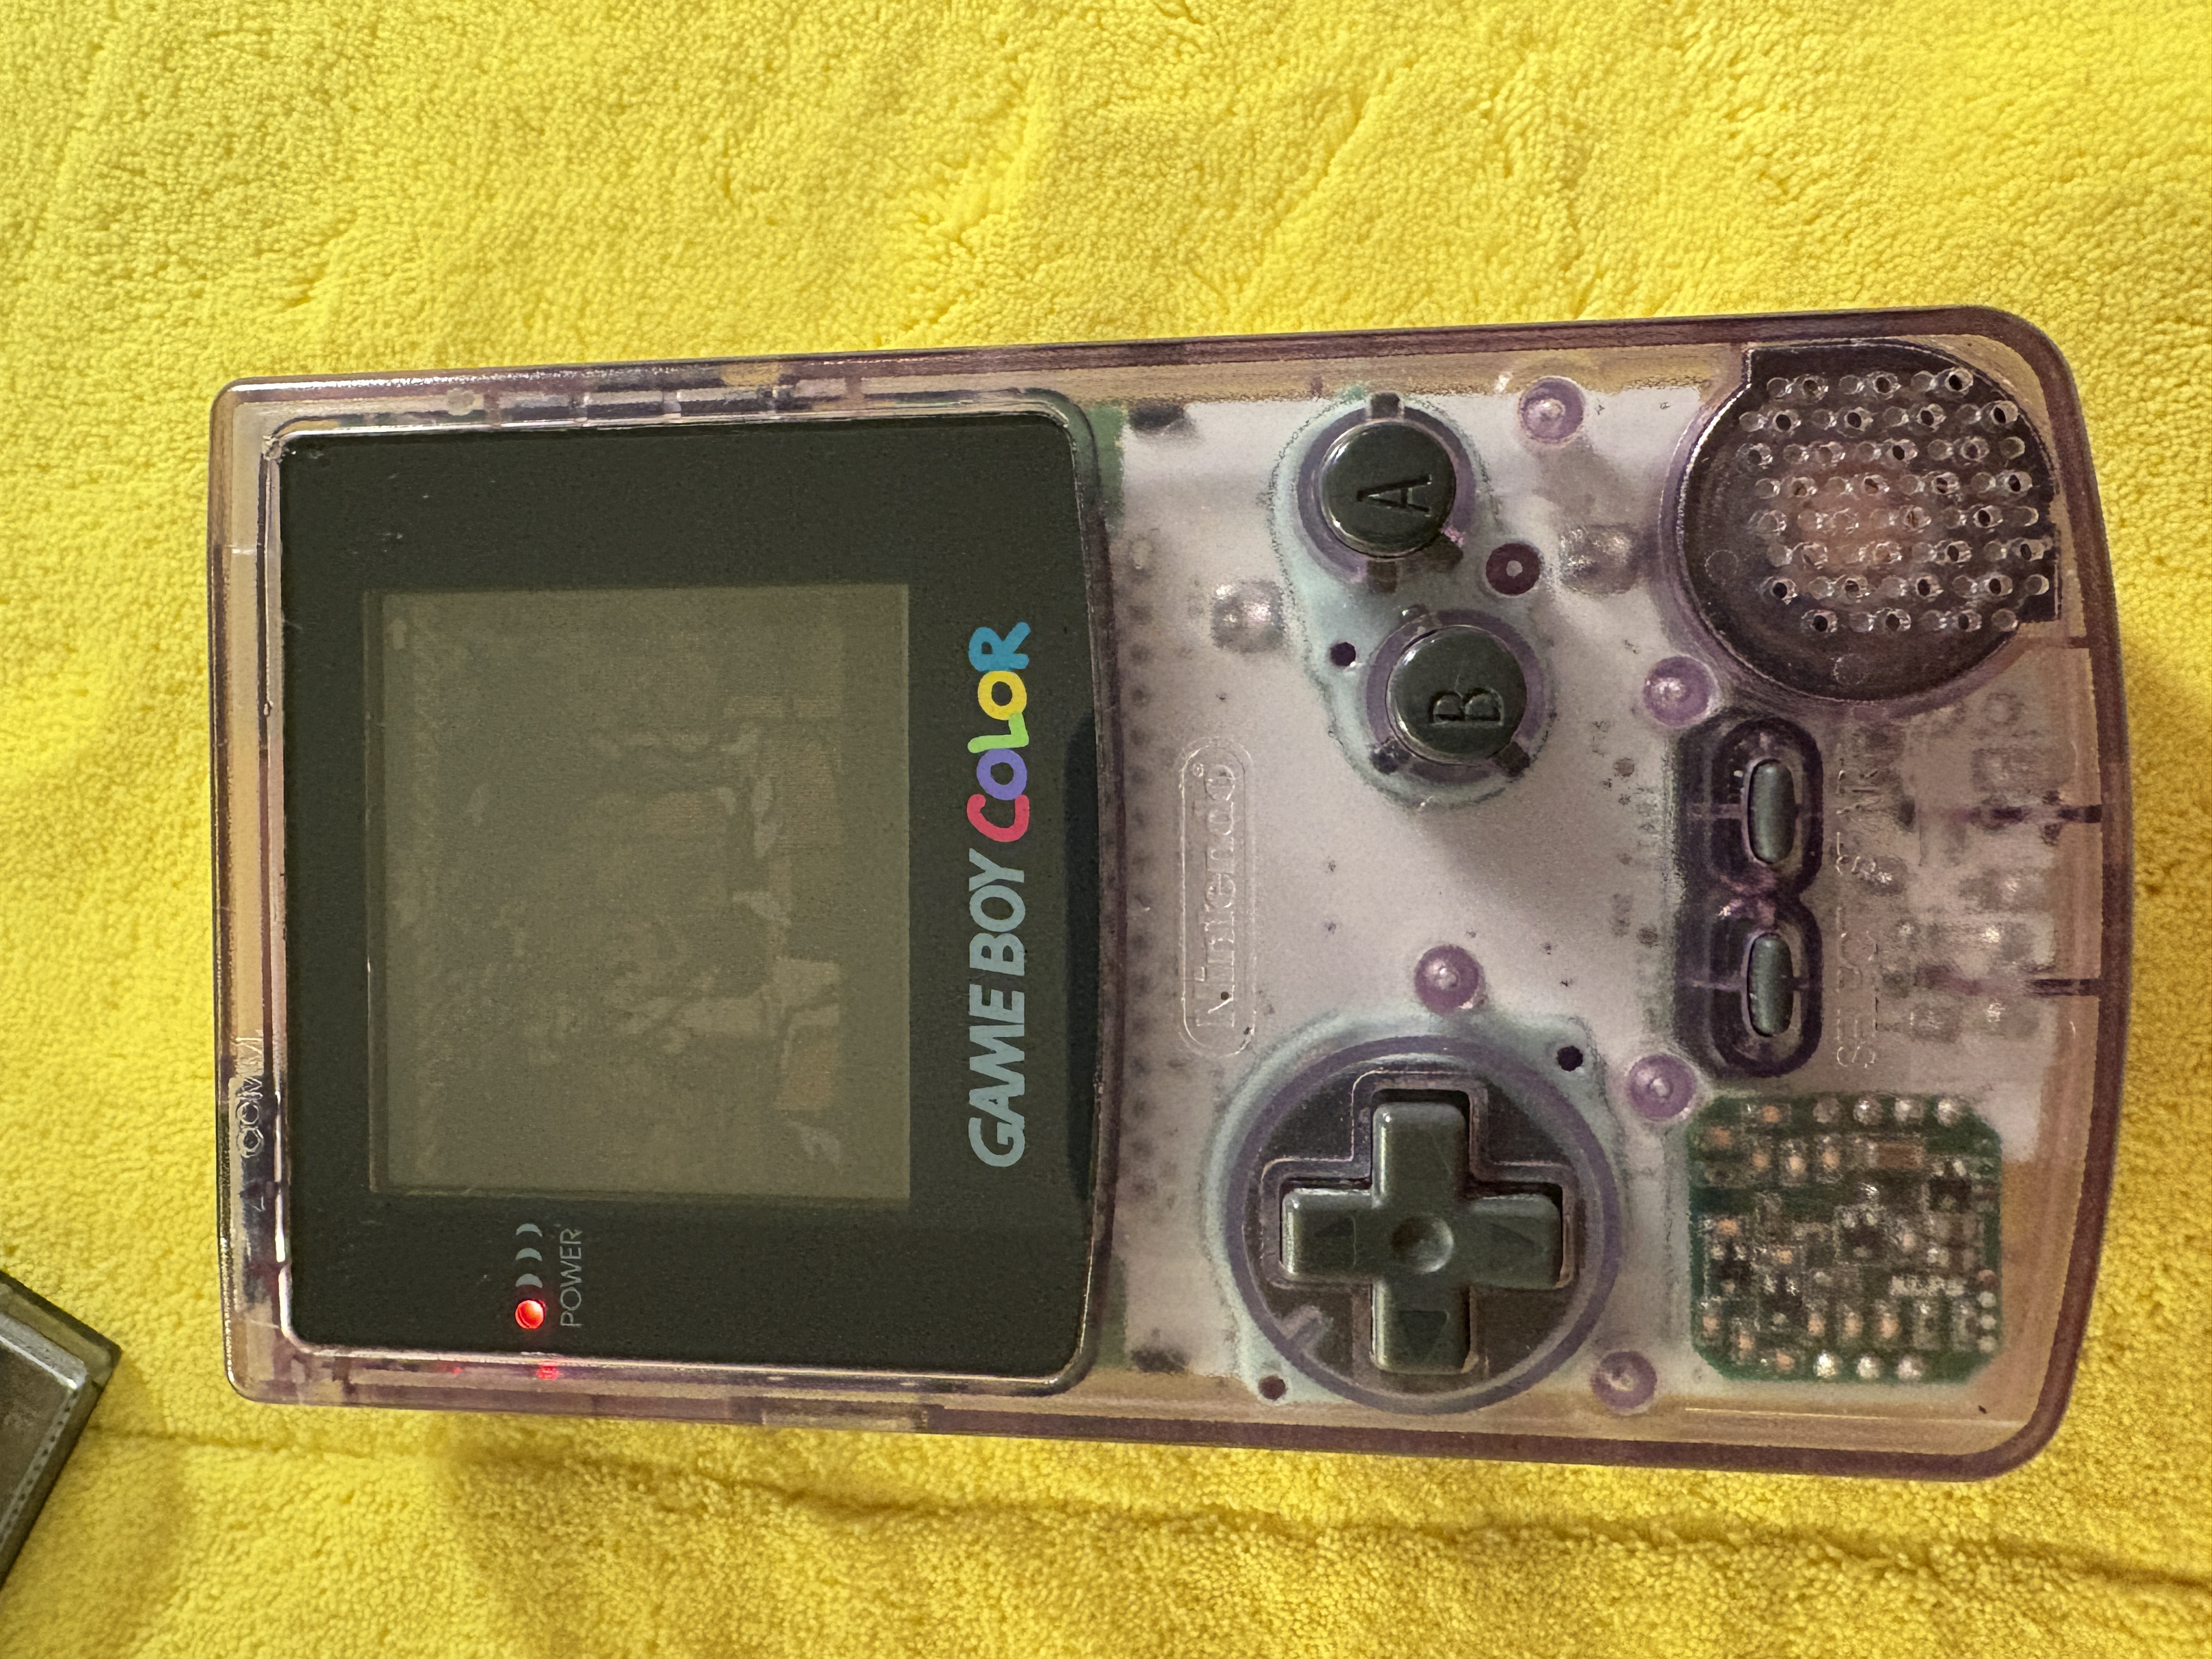
- Insert batteries and a game into the Game Boy Color.
- Turn on the console and check if the screen displays properly. Look for defects, such as a dim screen.
- The original screen is often hard to see and outdated. We’re going to fix that!
Step 2: Open the Shell
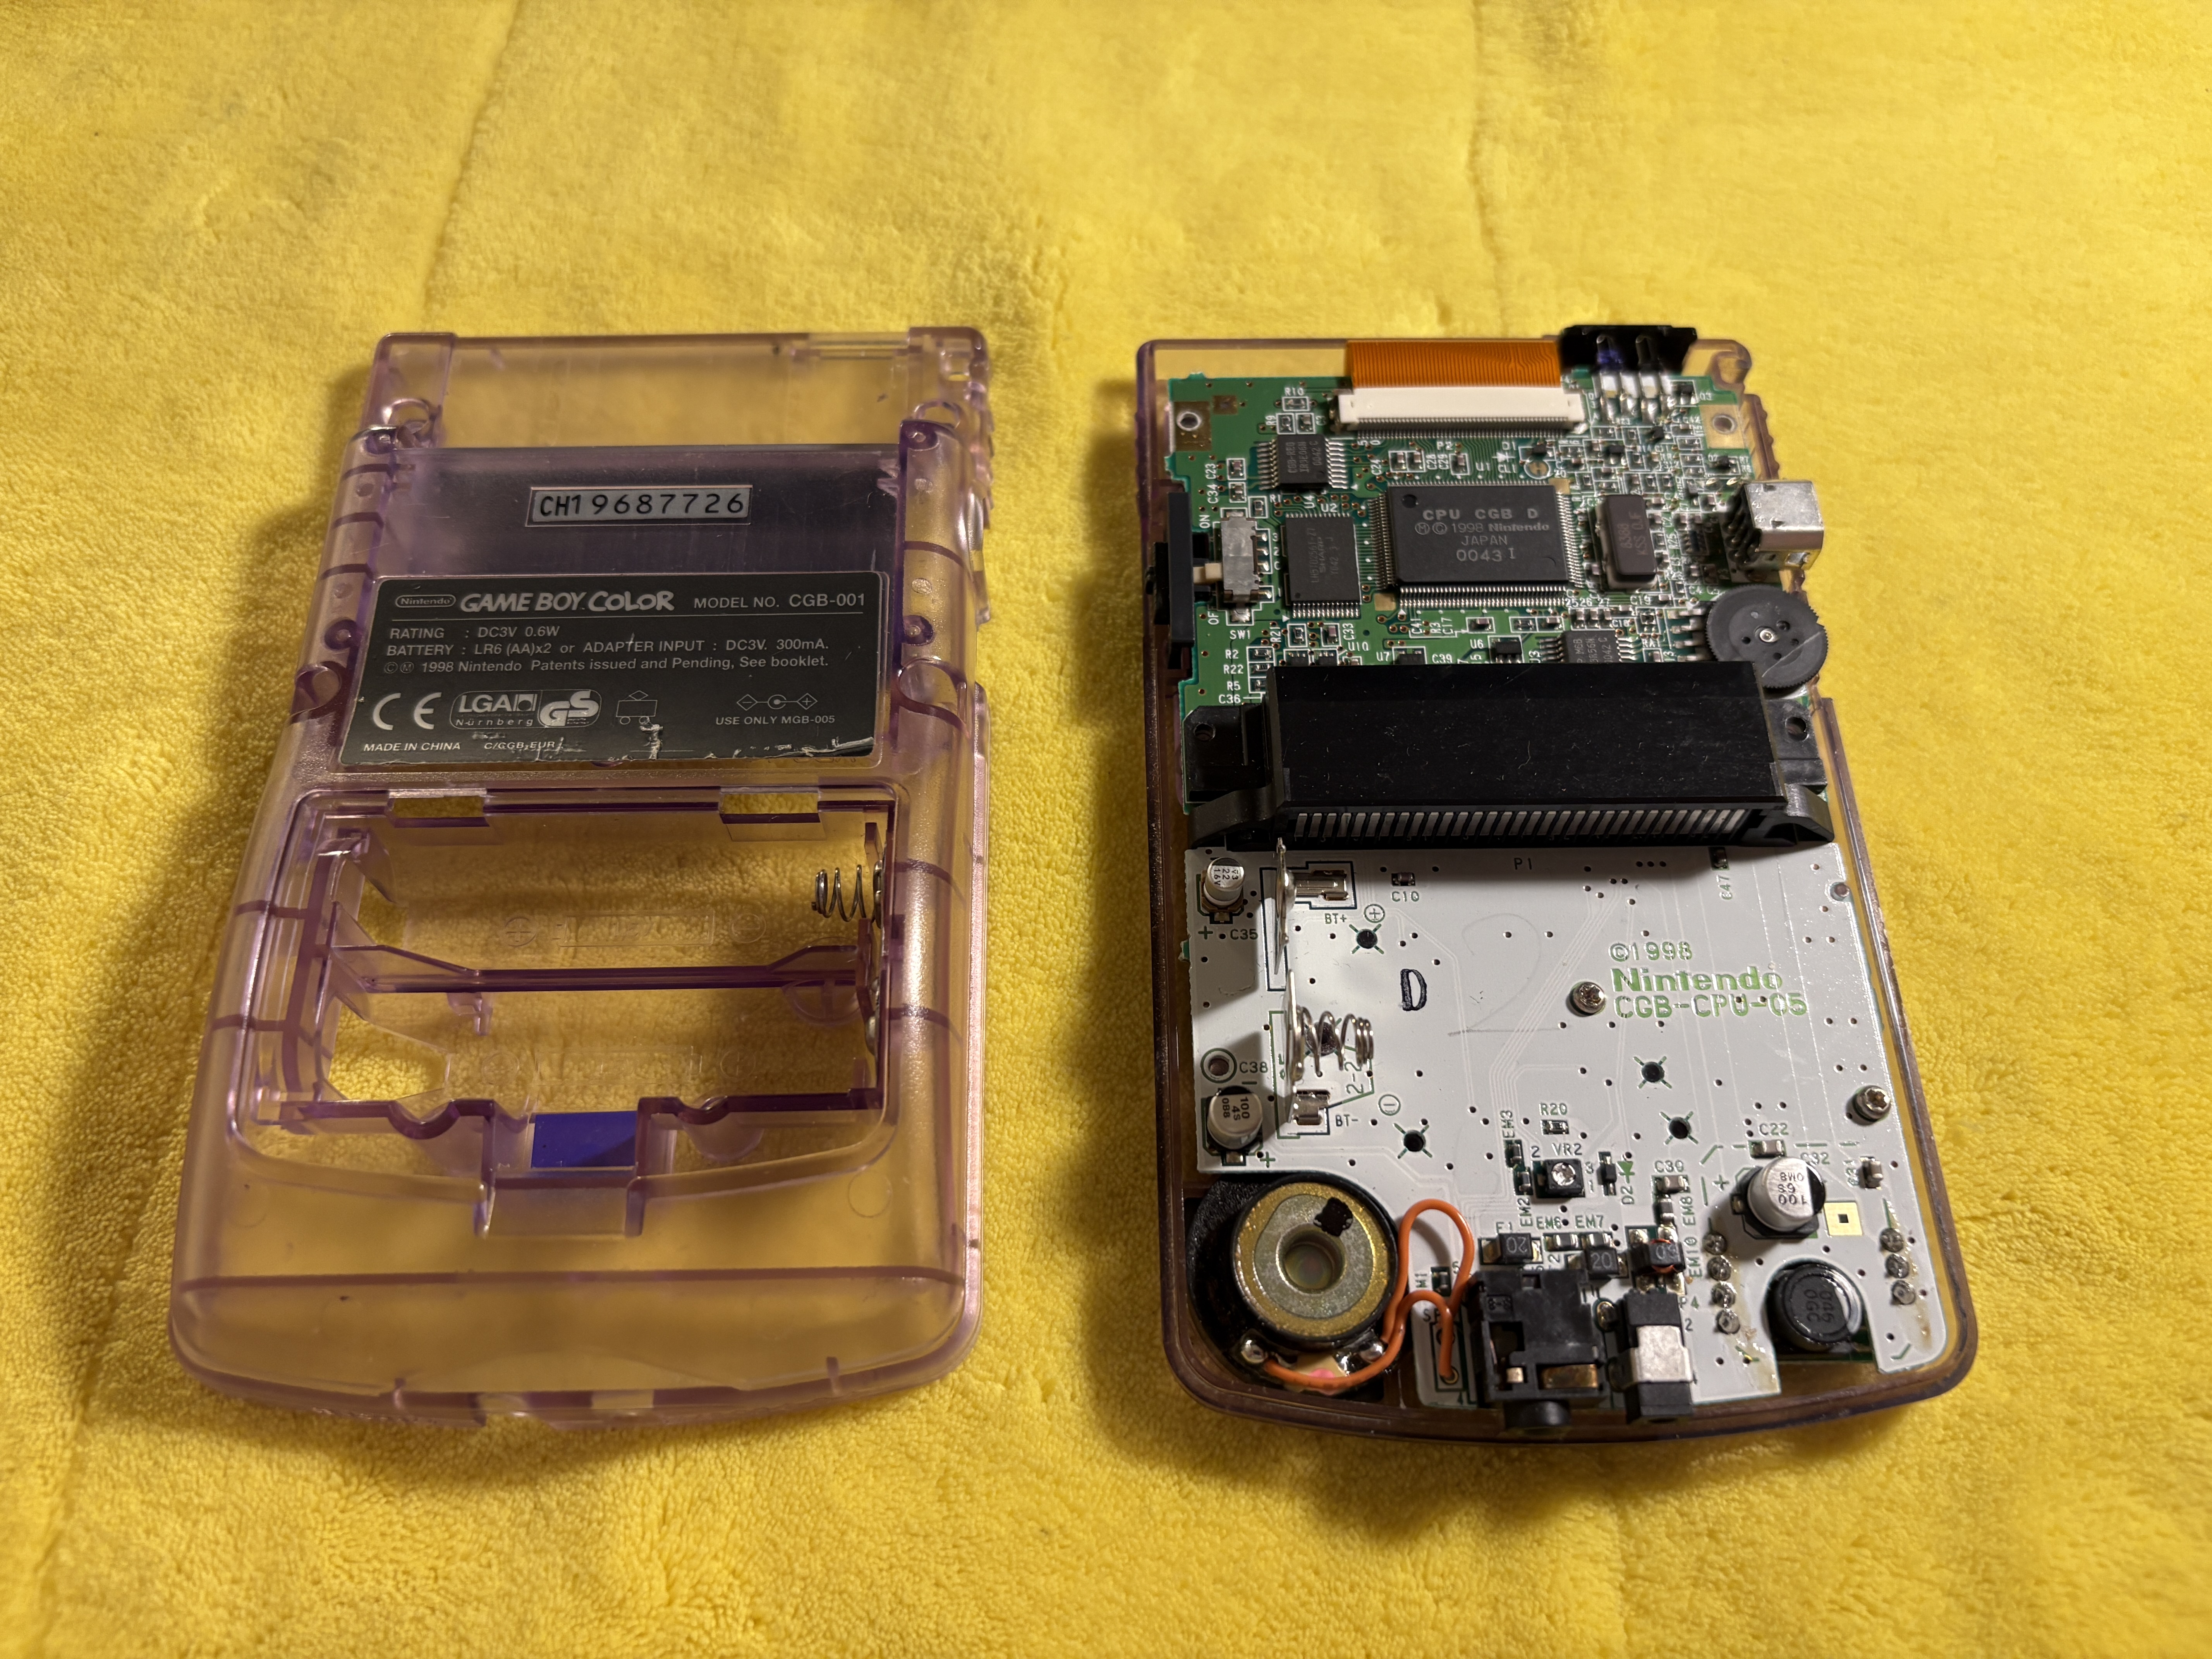
- Unscrew the tri-wing screws on the back of the Game Boy.
- Tip: Loosen each screw slightly before fully removing them. Work in an X or zigzag pattern to avoid damaging the shell.
- Carefully remove the back of the shell.
Step 3: Disconnect the Screen
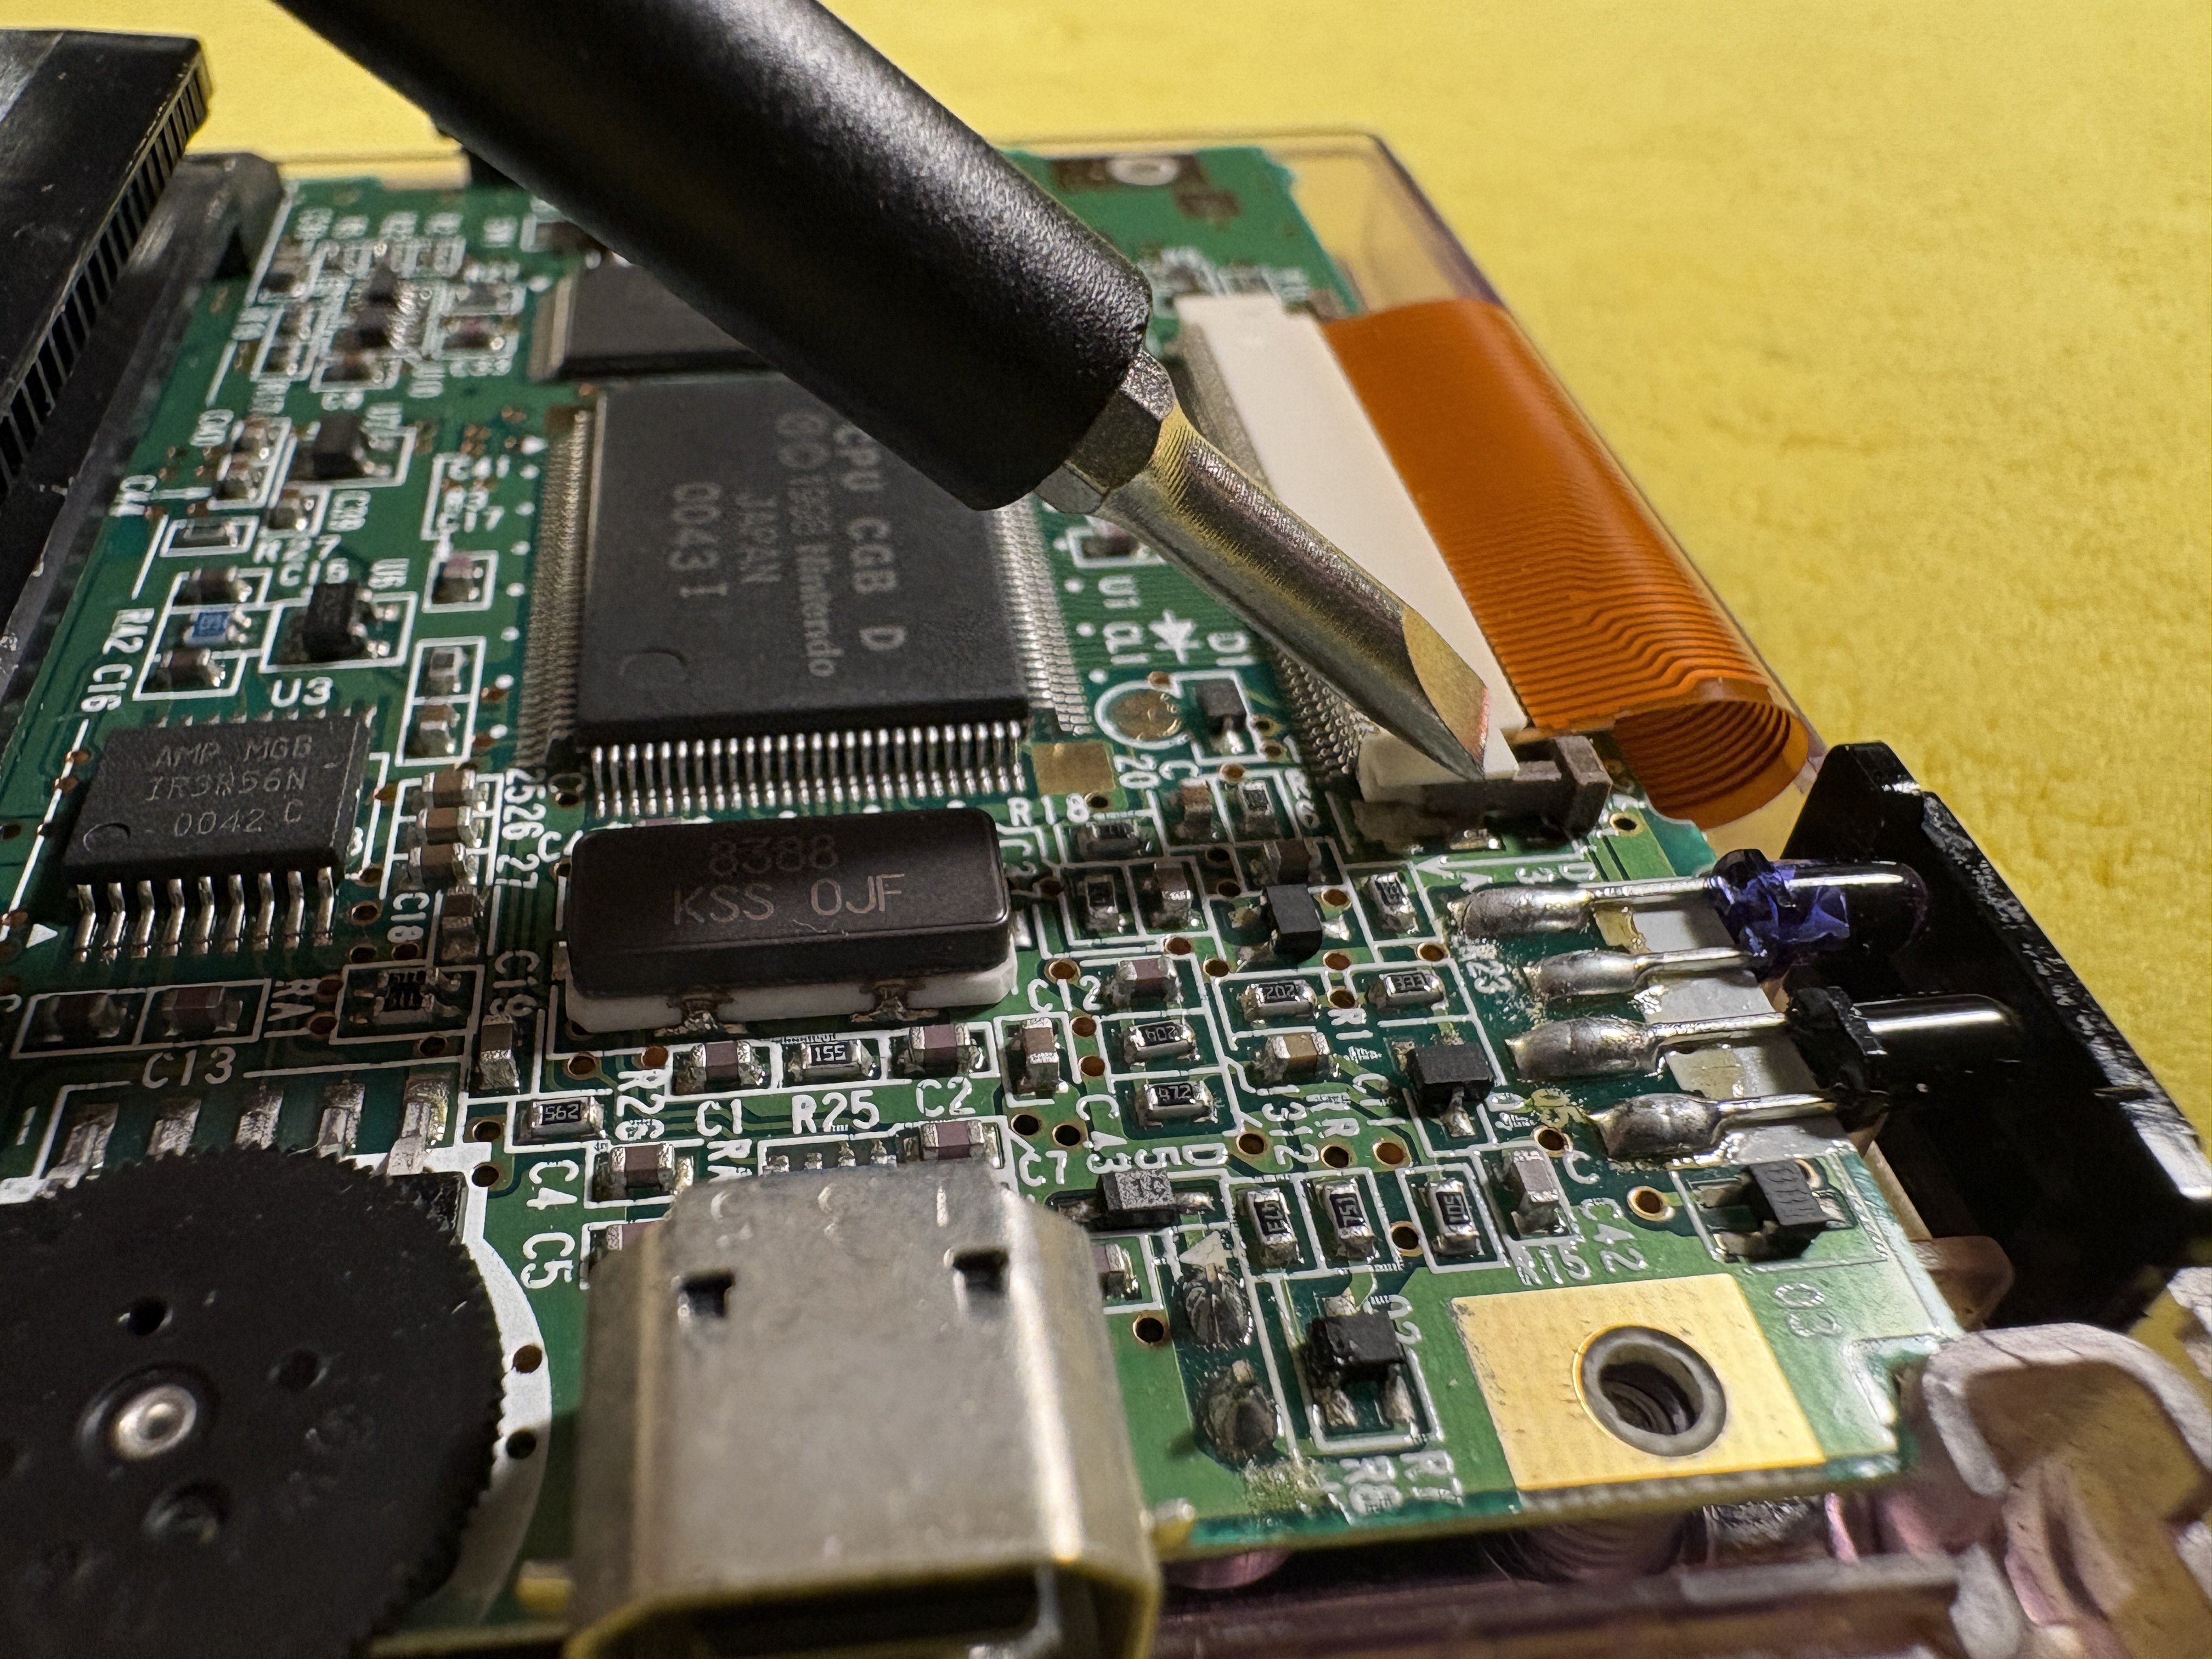
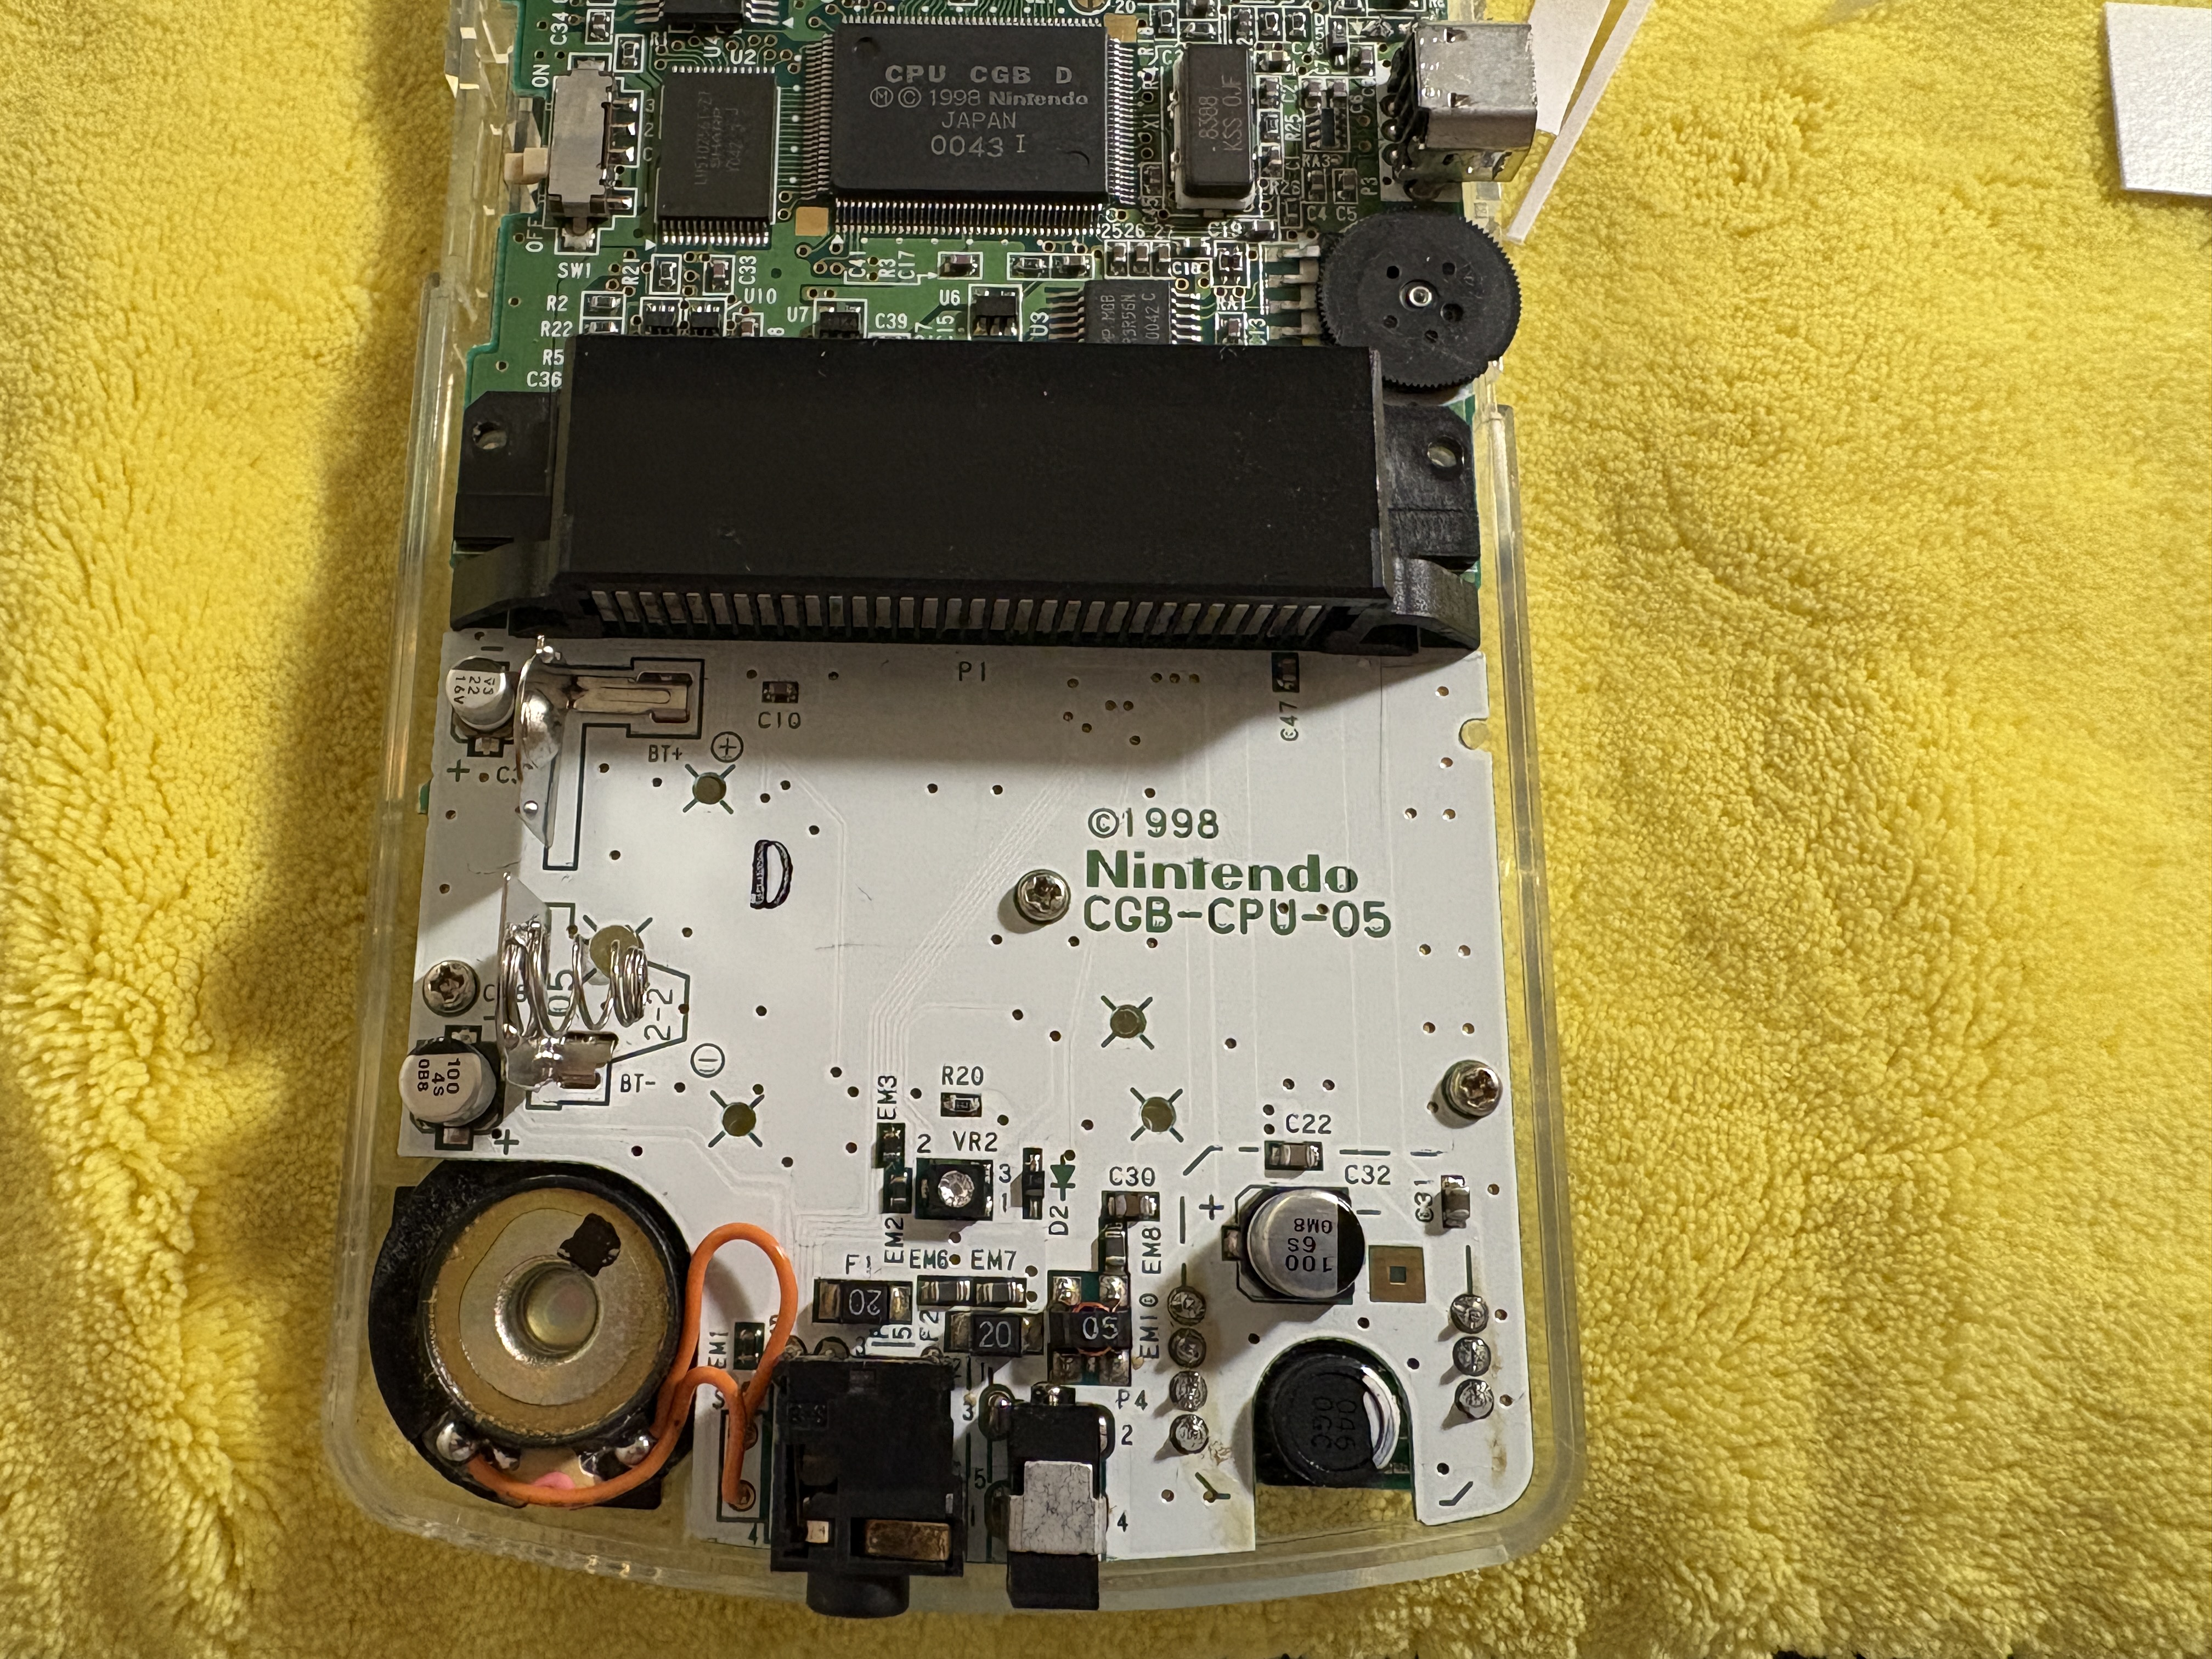
- Inspect the motherboard. At the bottom, you’ll see the battery contacts and at the top, the ribbon cable connecting to the screen.
- Disconnect the ribbon cable by gently pushing up the brown tabs. Use your fingernails or a small screwdriver, but avoid scratching the motherboard.
Step 4: Remove the Motherboard
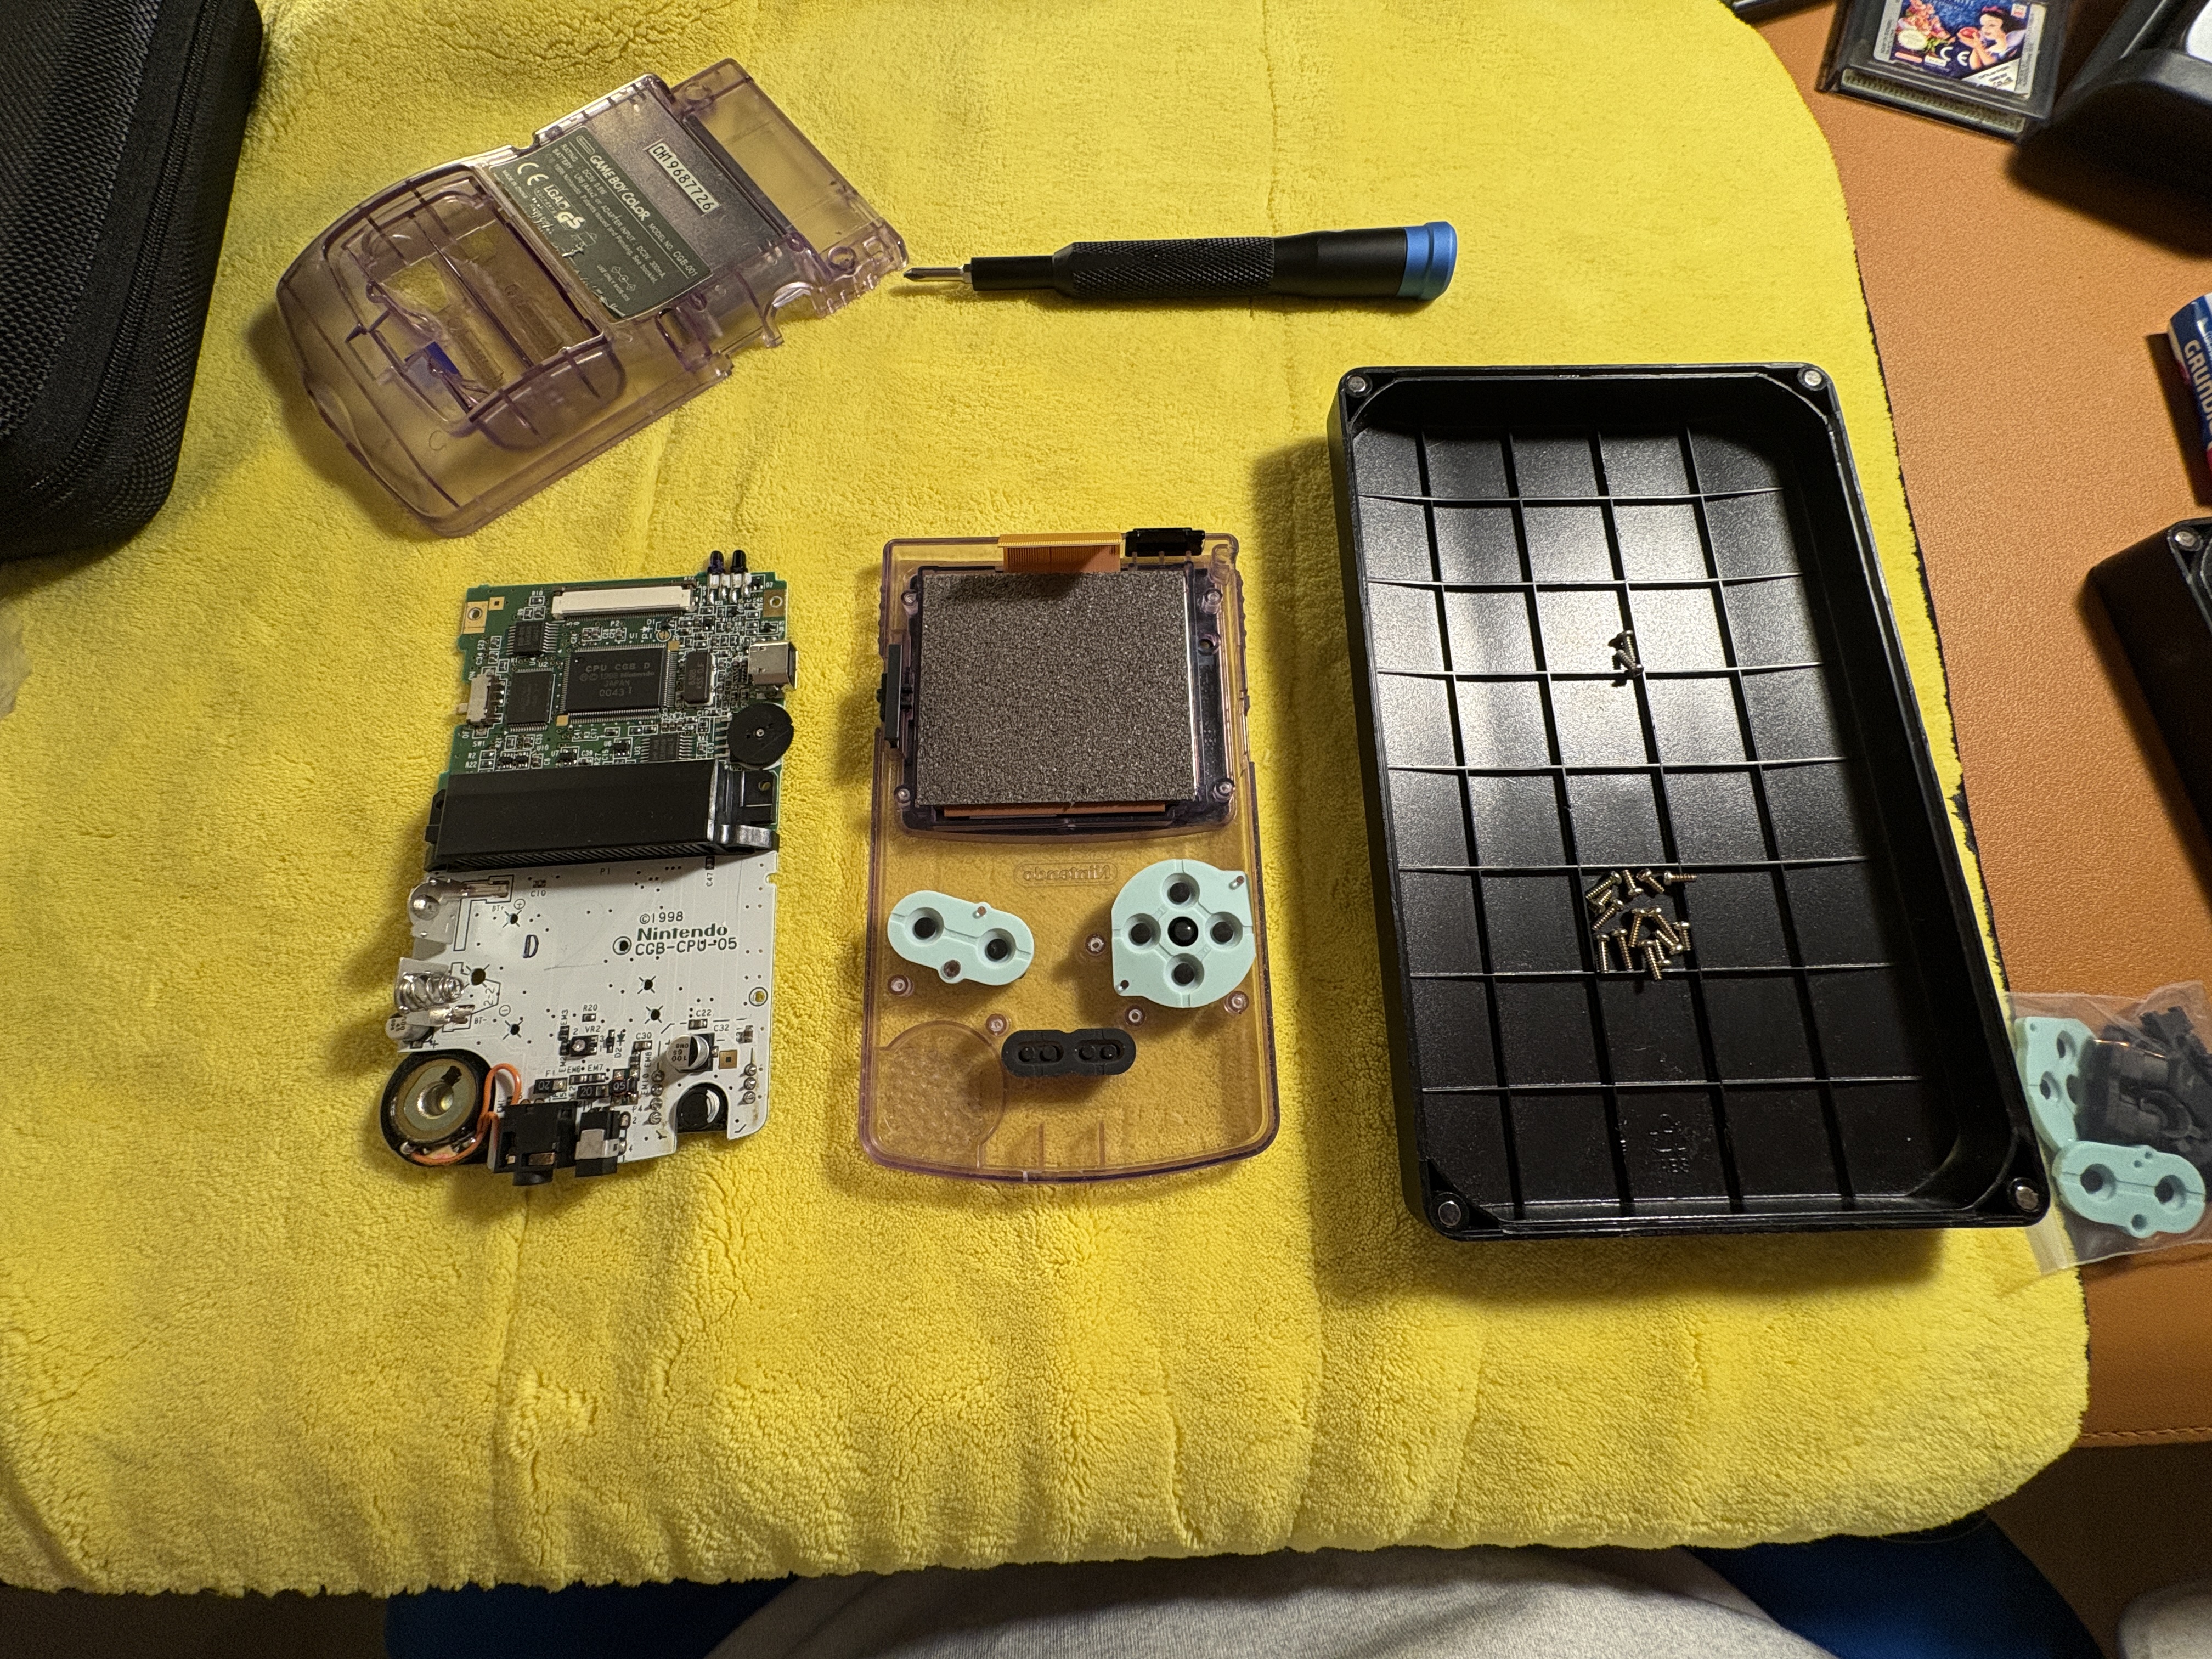
- Unscrew the motherboard and gently remove it from the shell. Keep the screws in a safe place.
- Carefully lift the motherboard and speaker out of the shell.
Step 5: Clean the Motherboard
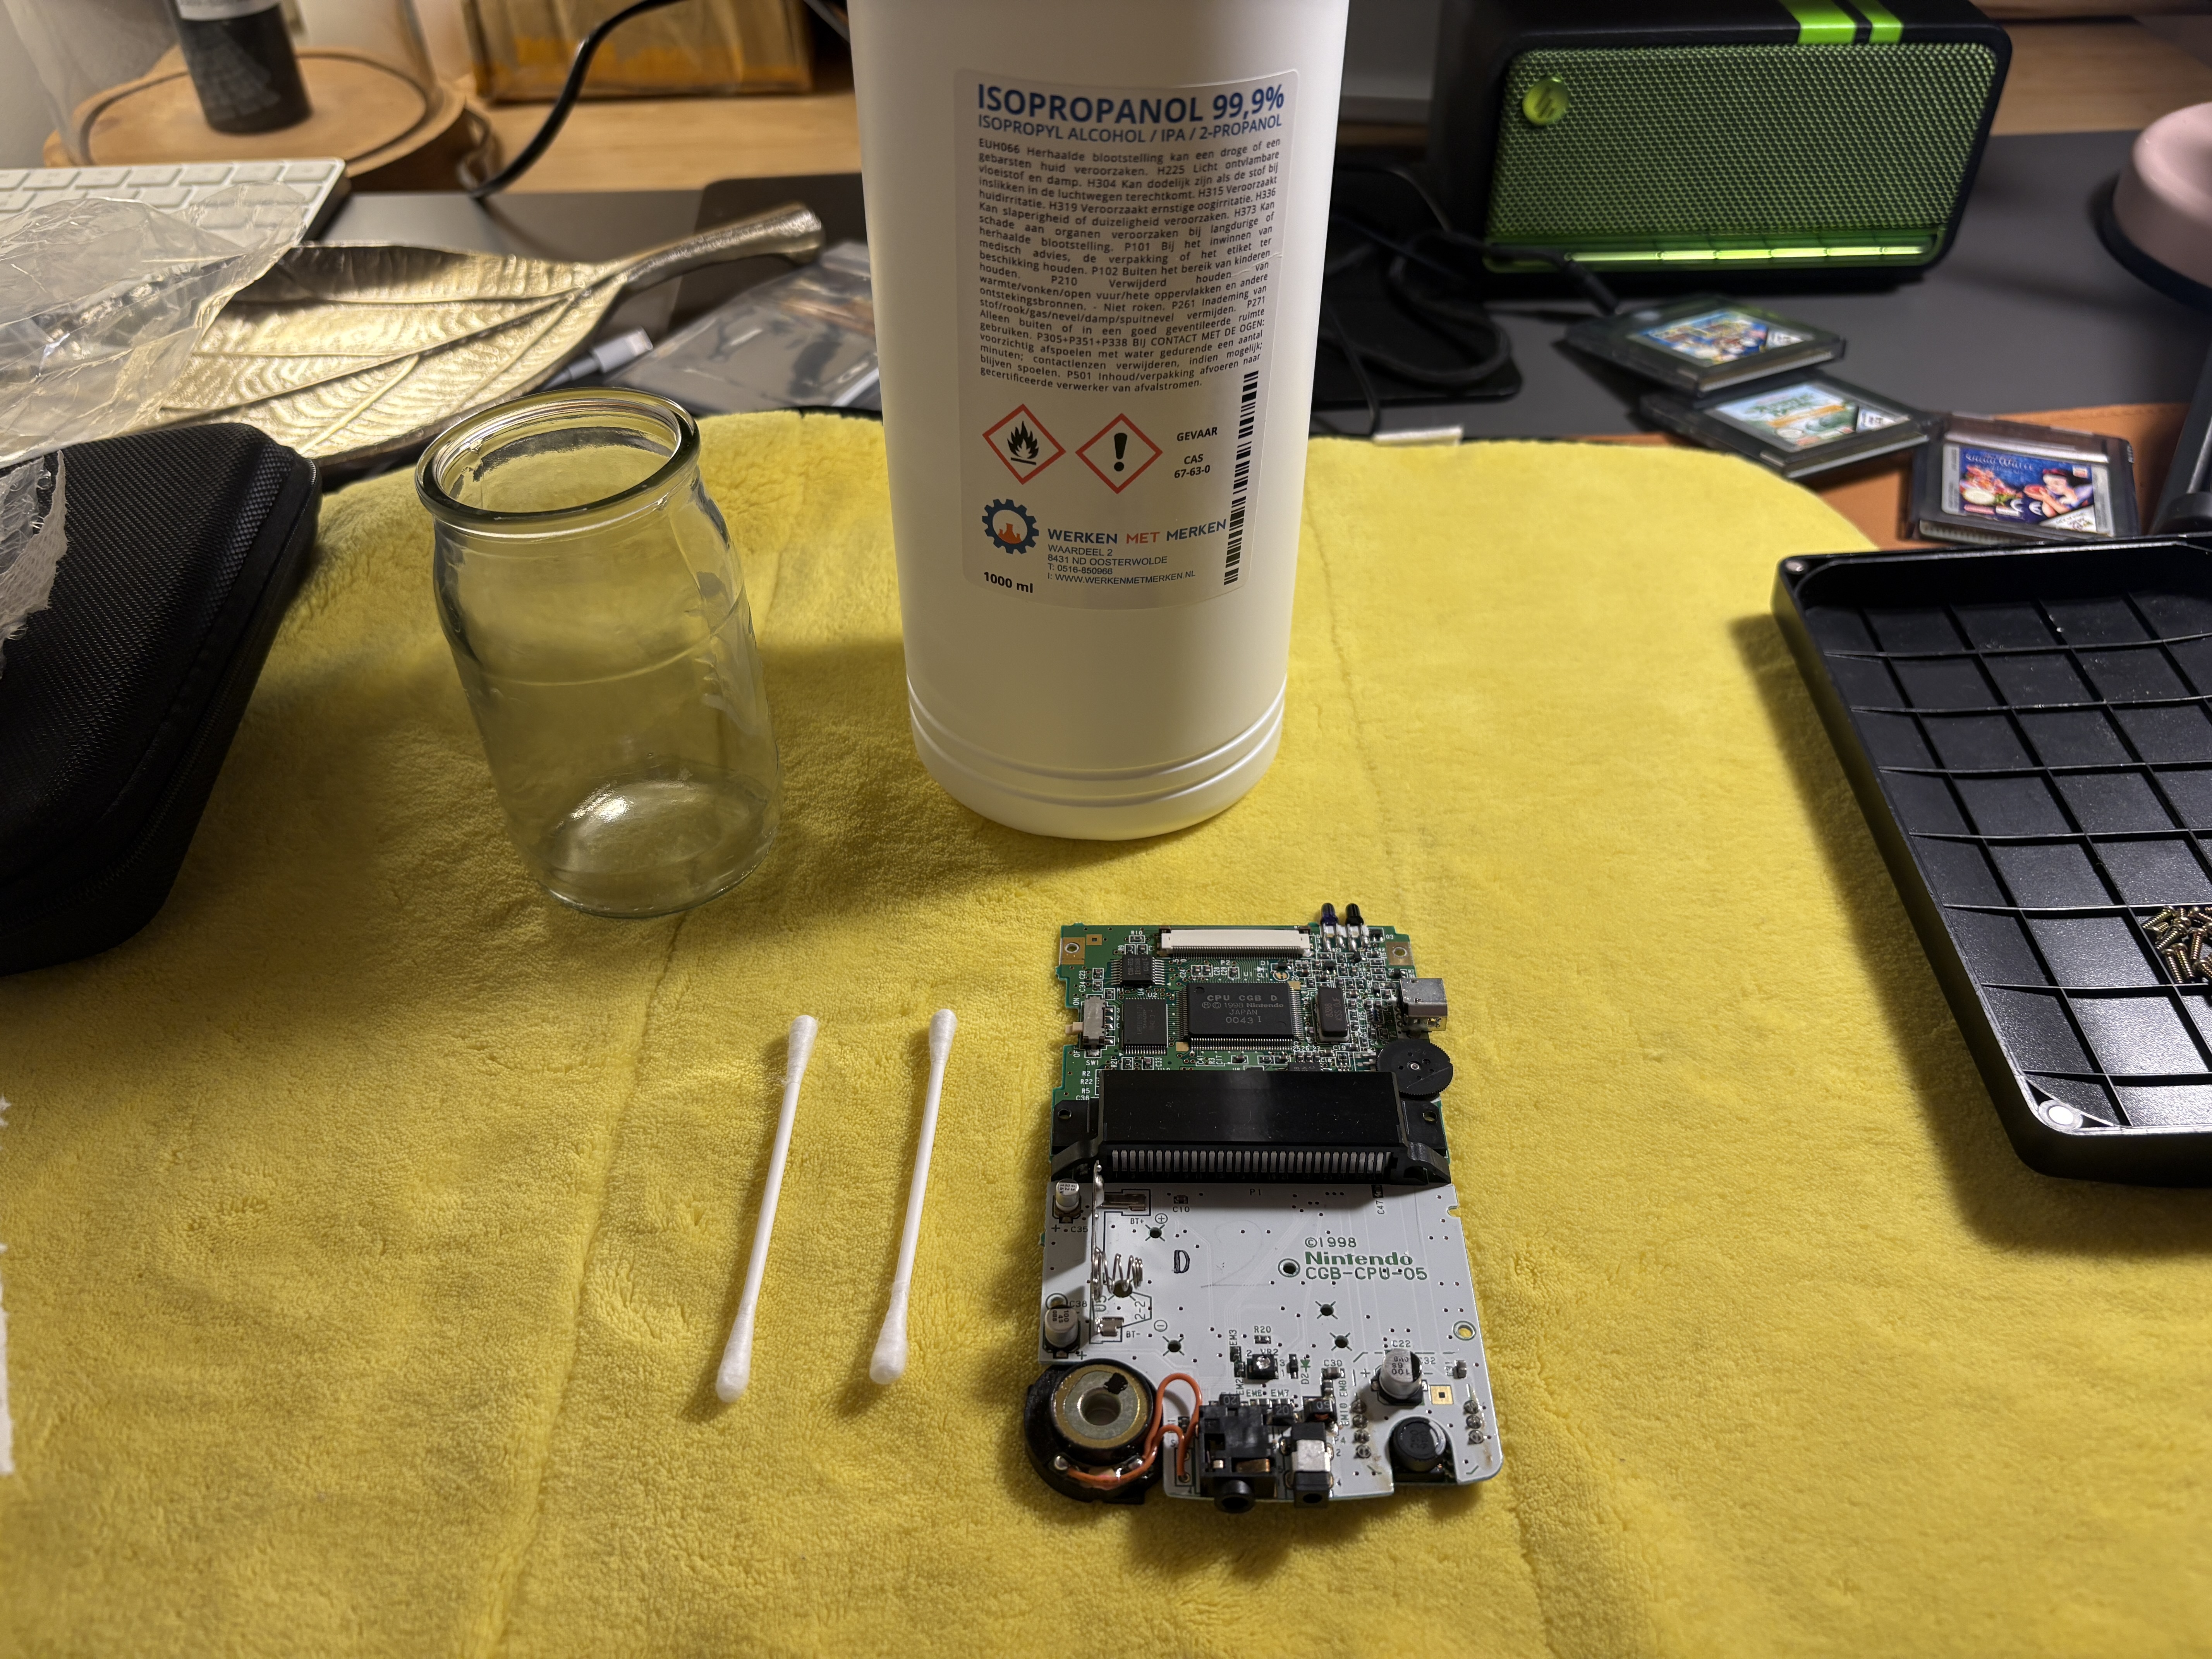
- Use isopropyl alcohol and cotton swabs to remove dirt and corrosion from the motherboard.
- Let the motherboard dry completely before proceeding.
Step 6: Install the New Screen
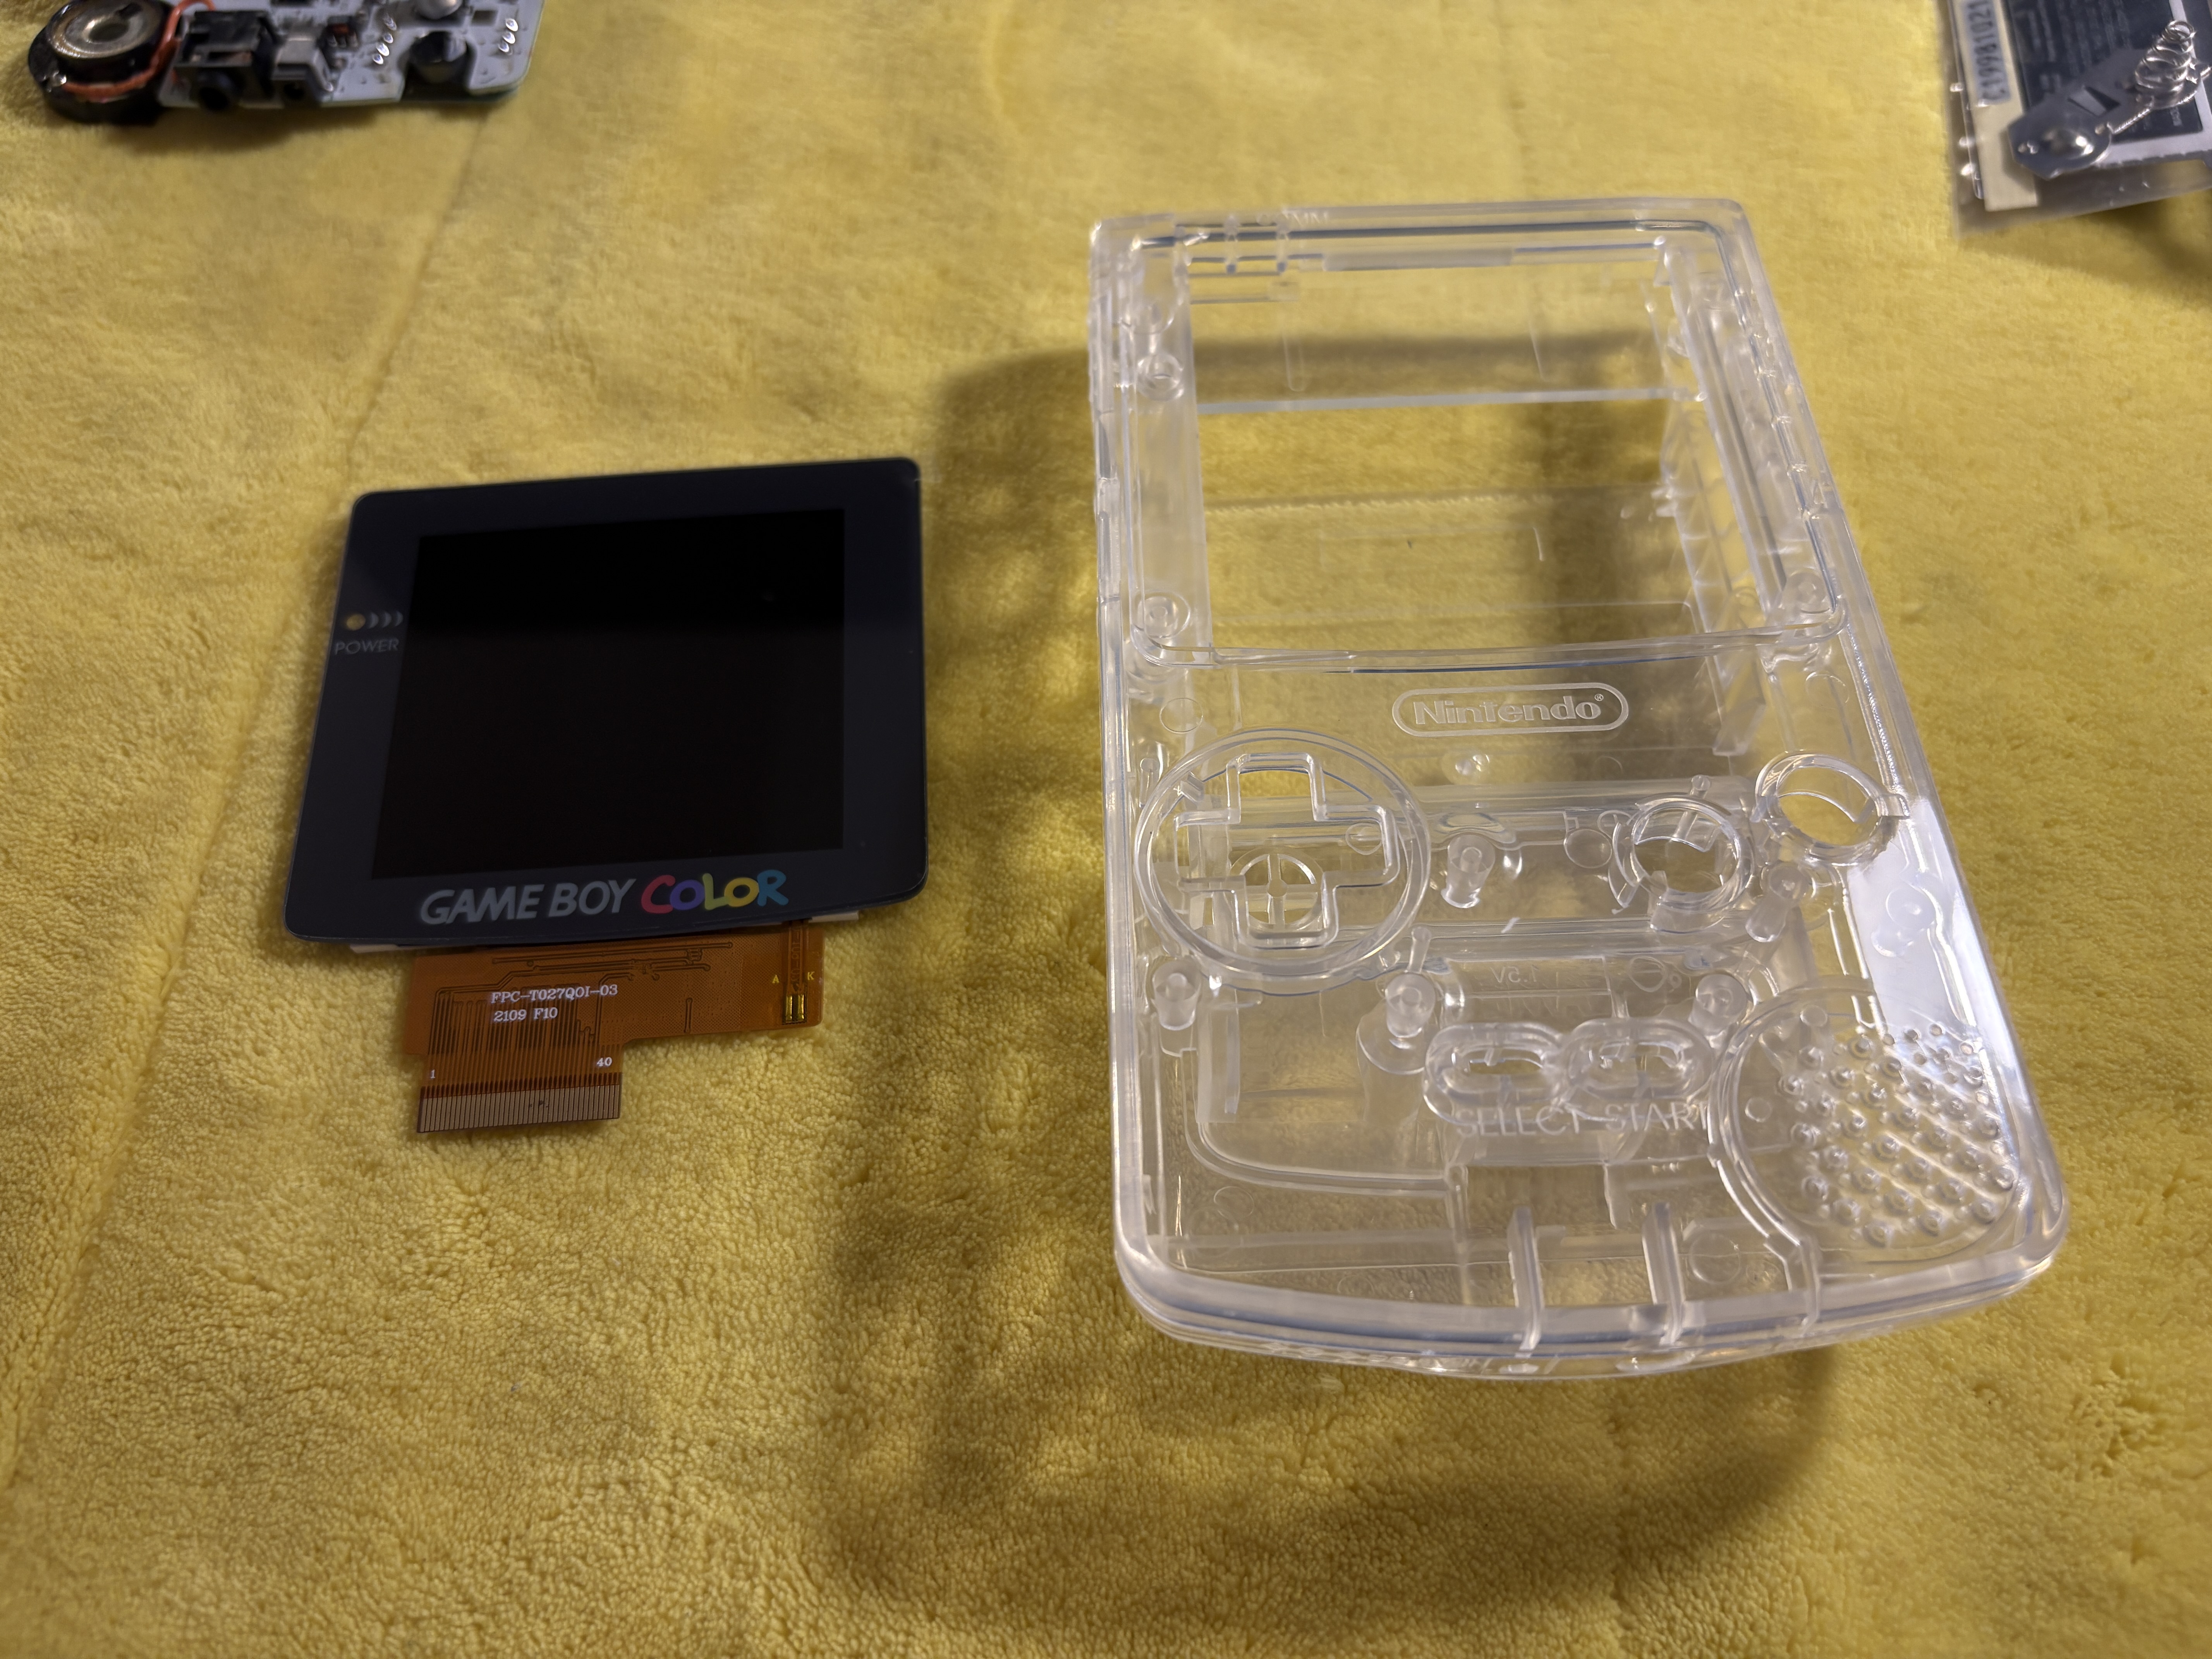
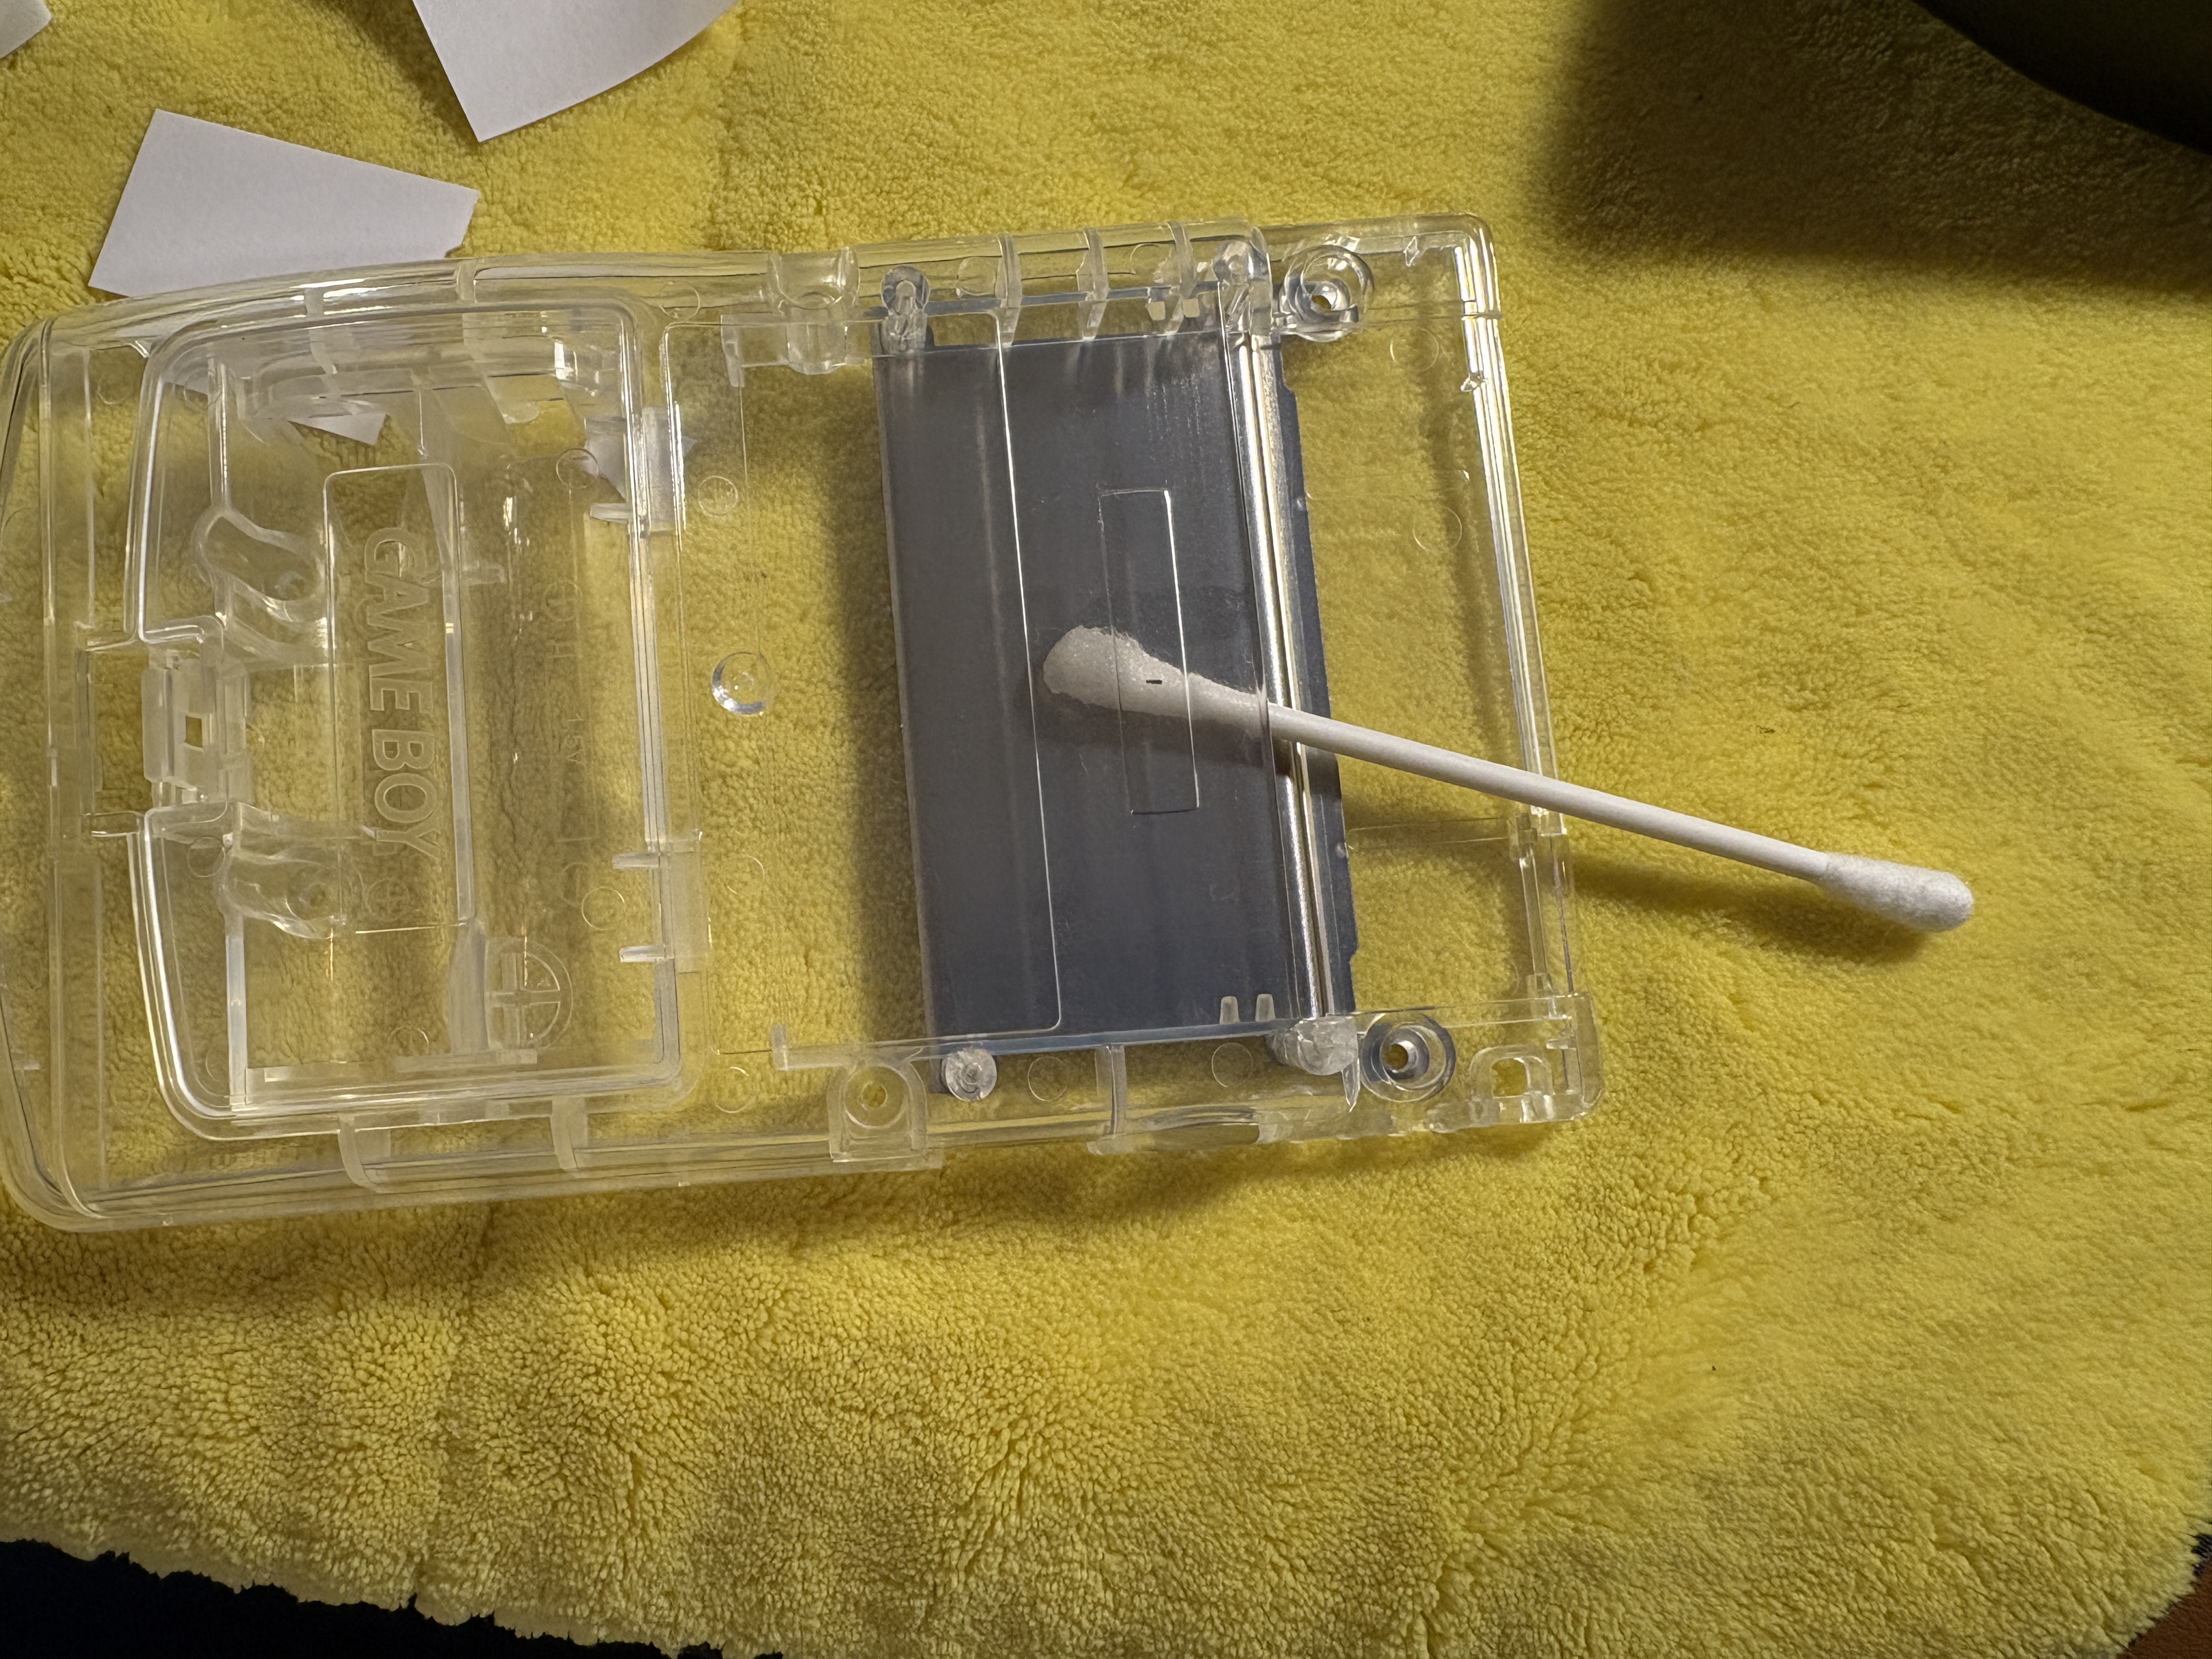
- Take the new front of the shell from the mod kit.
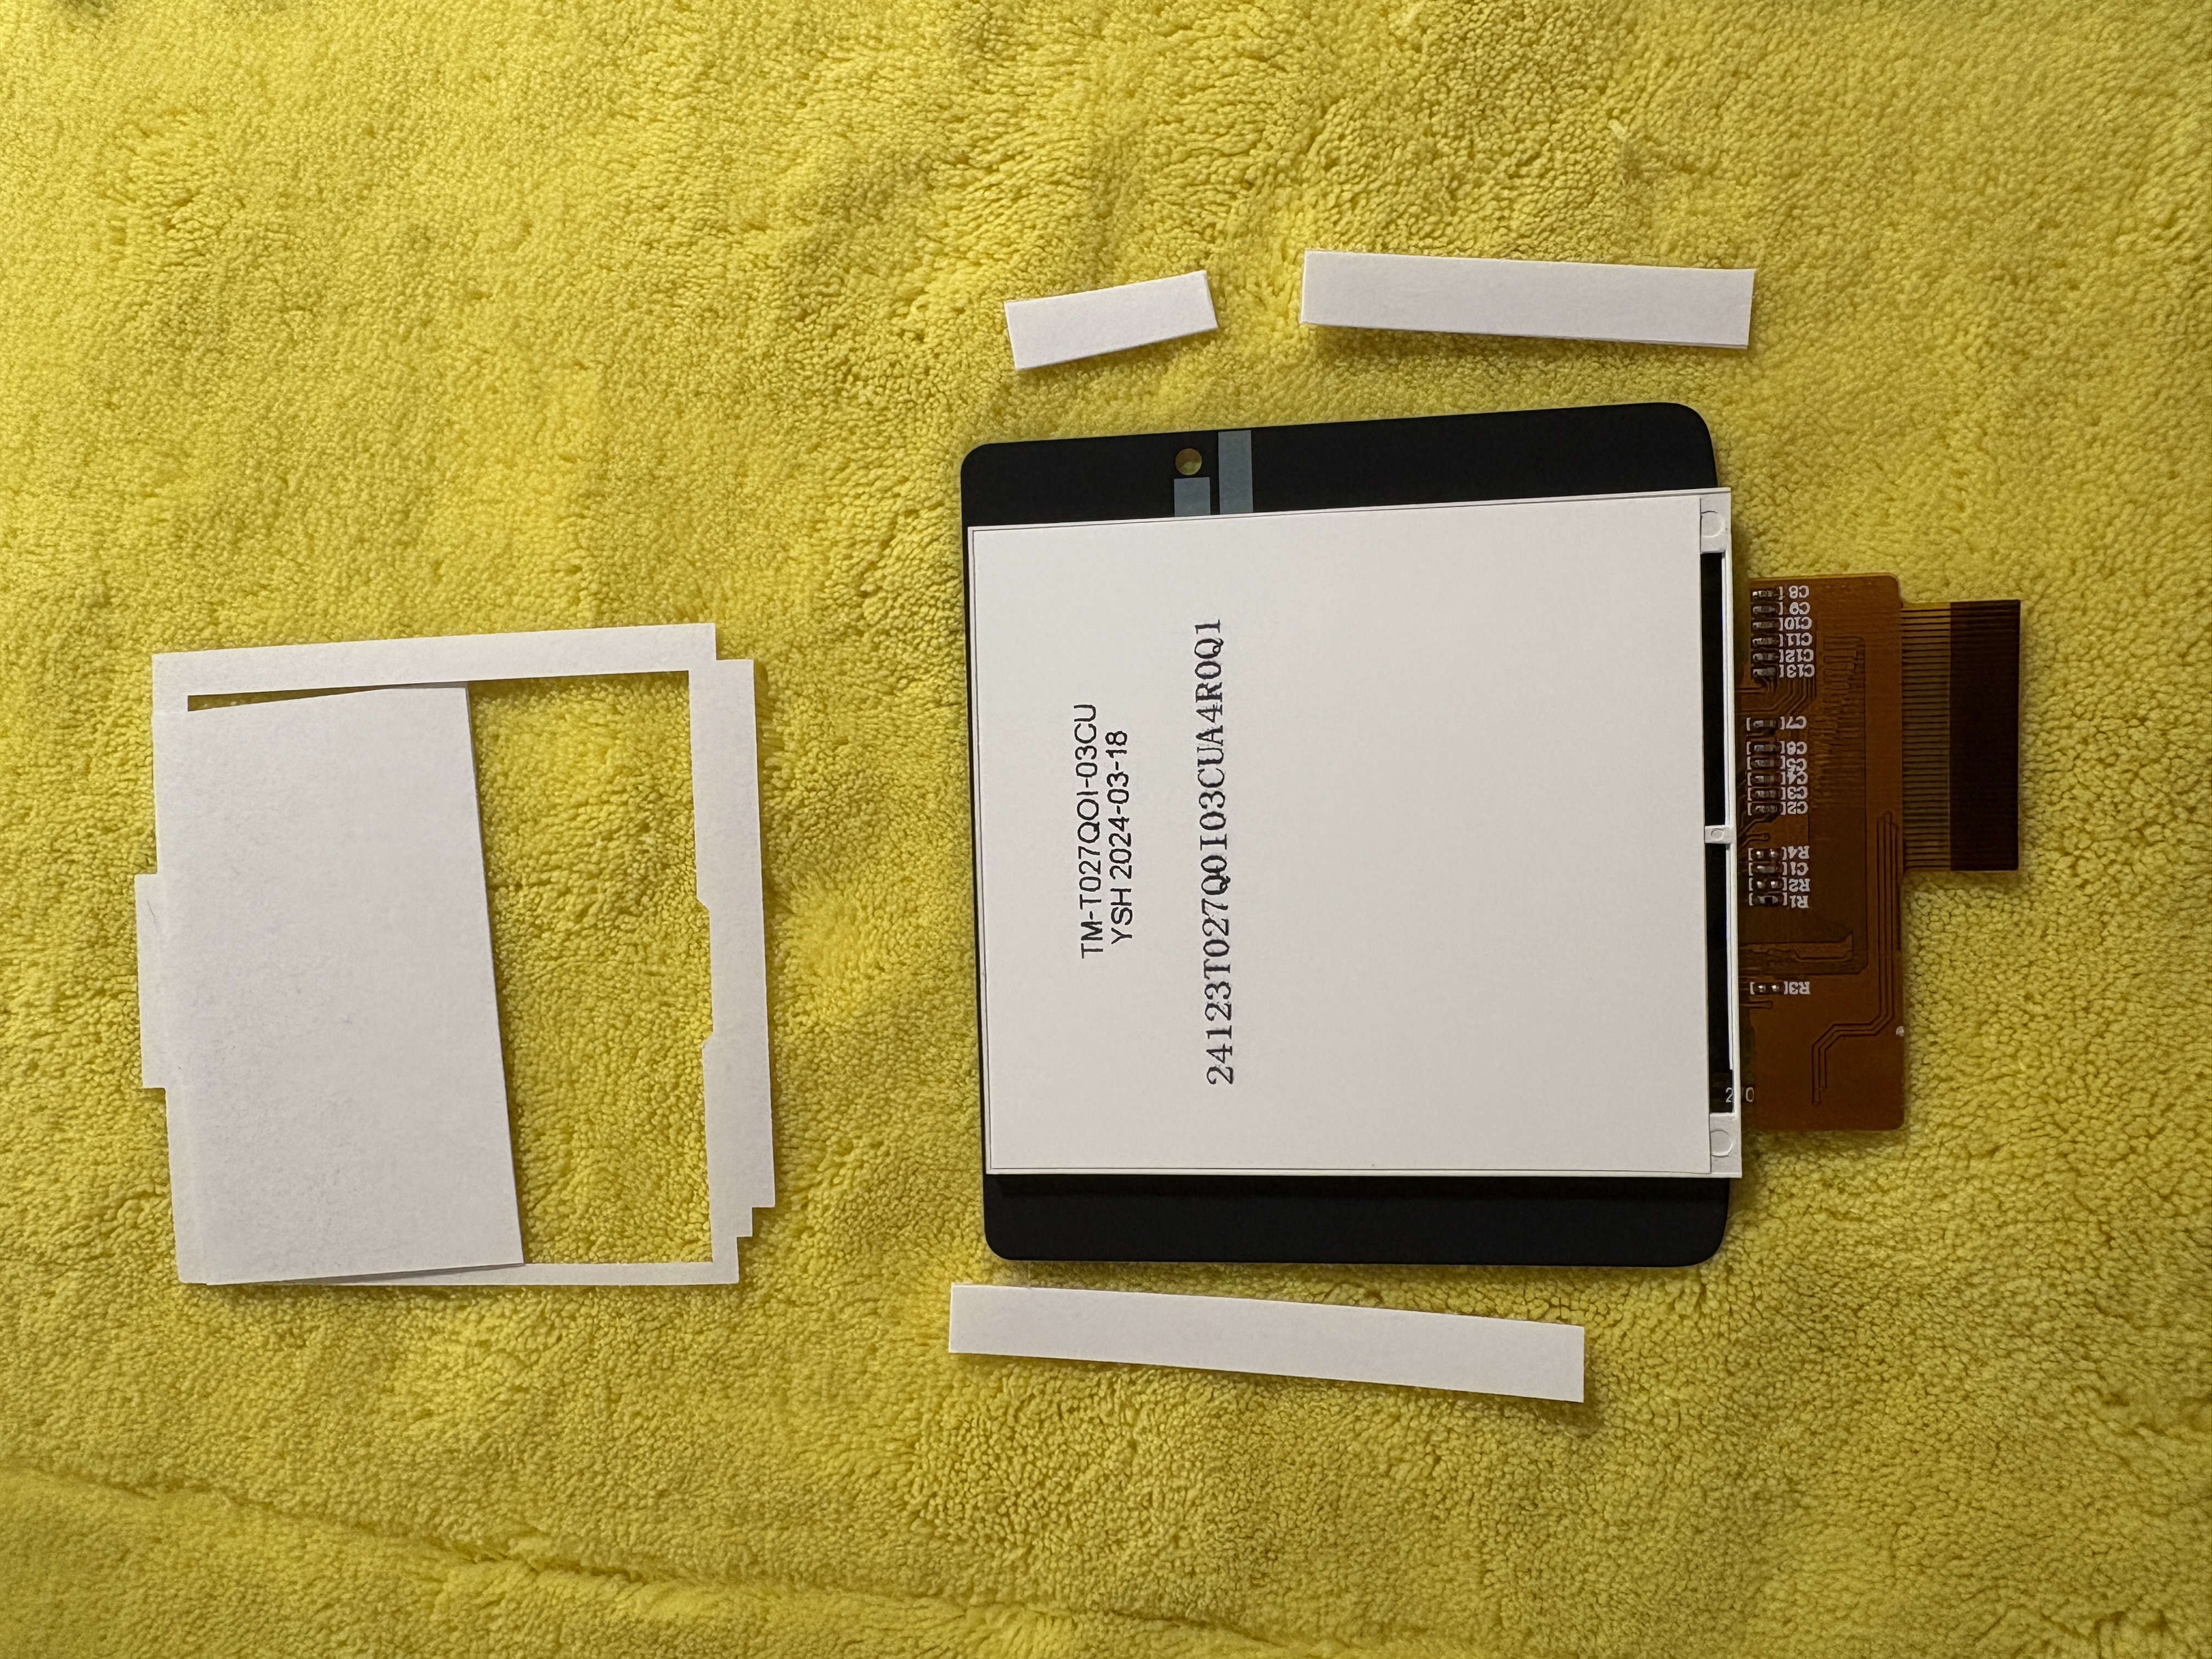
- Test fit the new screen in the shell without removing the protective layer of the double-sided tape.
- If everything fits well, remove the protective layer and firmly attach the screen.
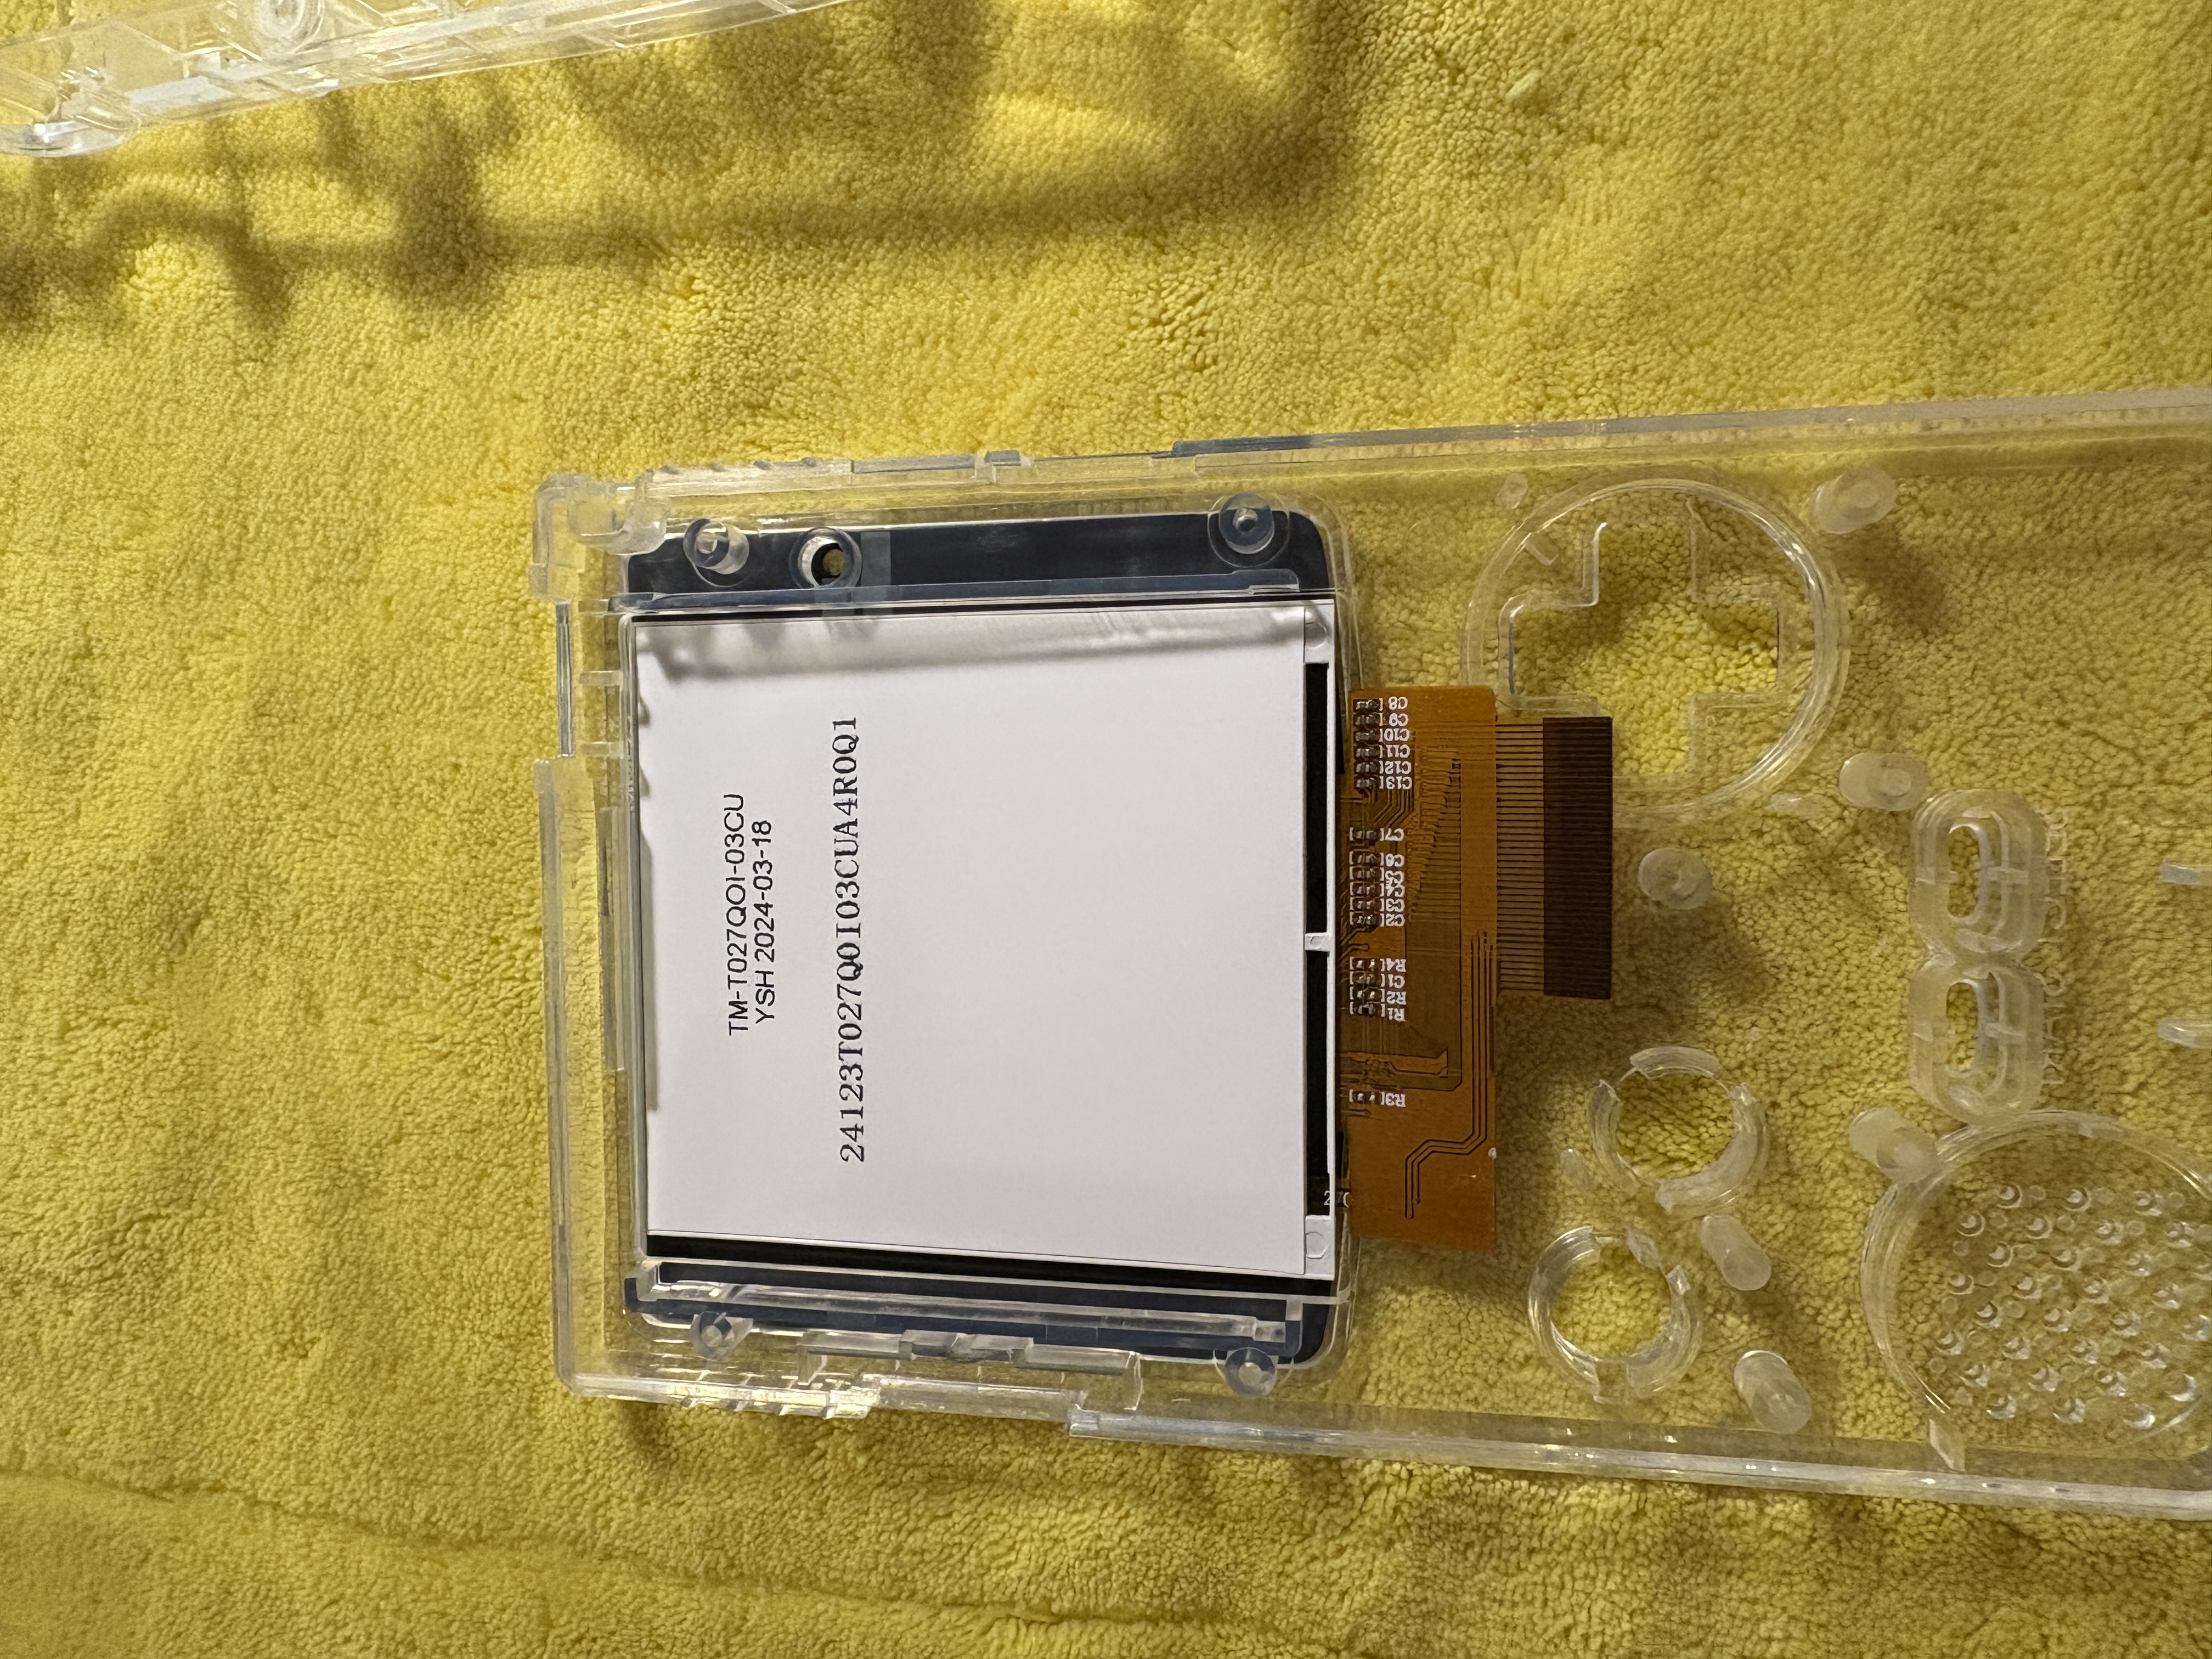
Note: In my IPS screen kit, the double-sided tape wasn’t pre-installed. For such mods, you may need to be creative. I used double-sided tape from another mod kit, cut pieces to size, and applied them to the screen. See the image below. Make sure not to cover the area for the LED light.
Step 7: Connect the Screen
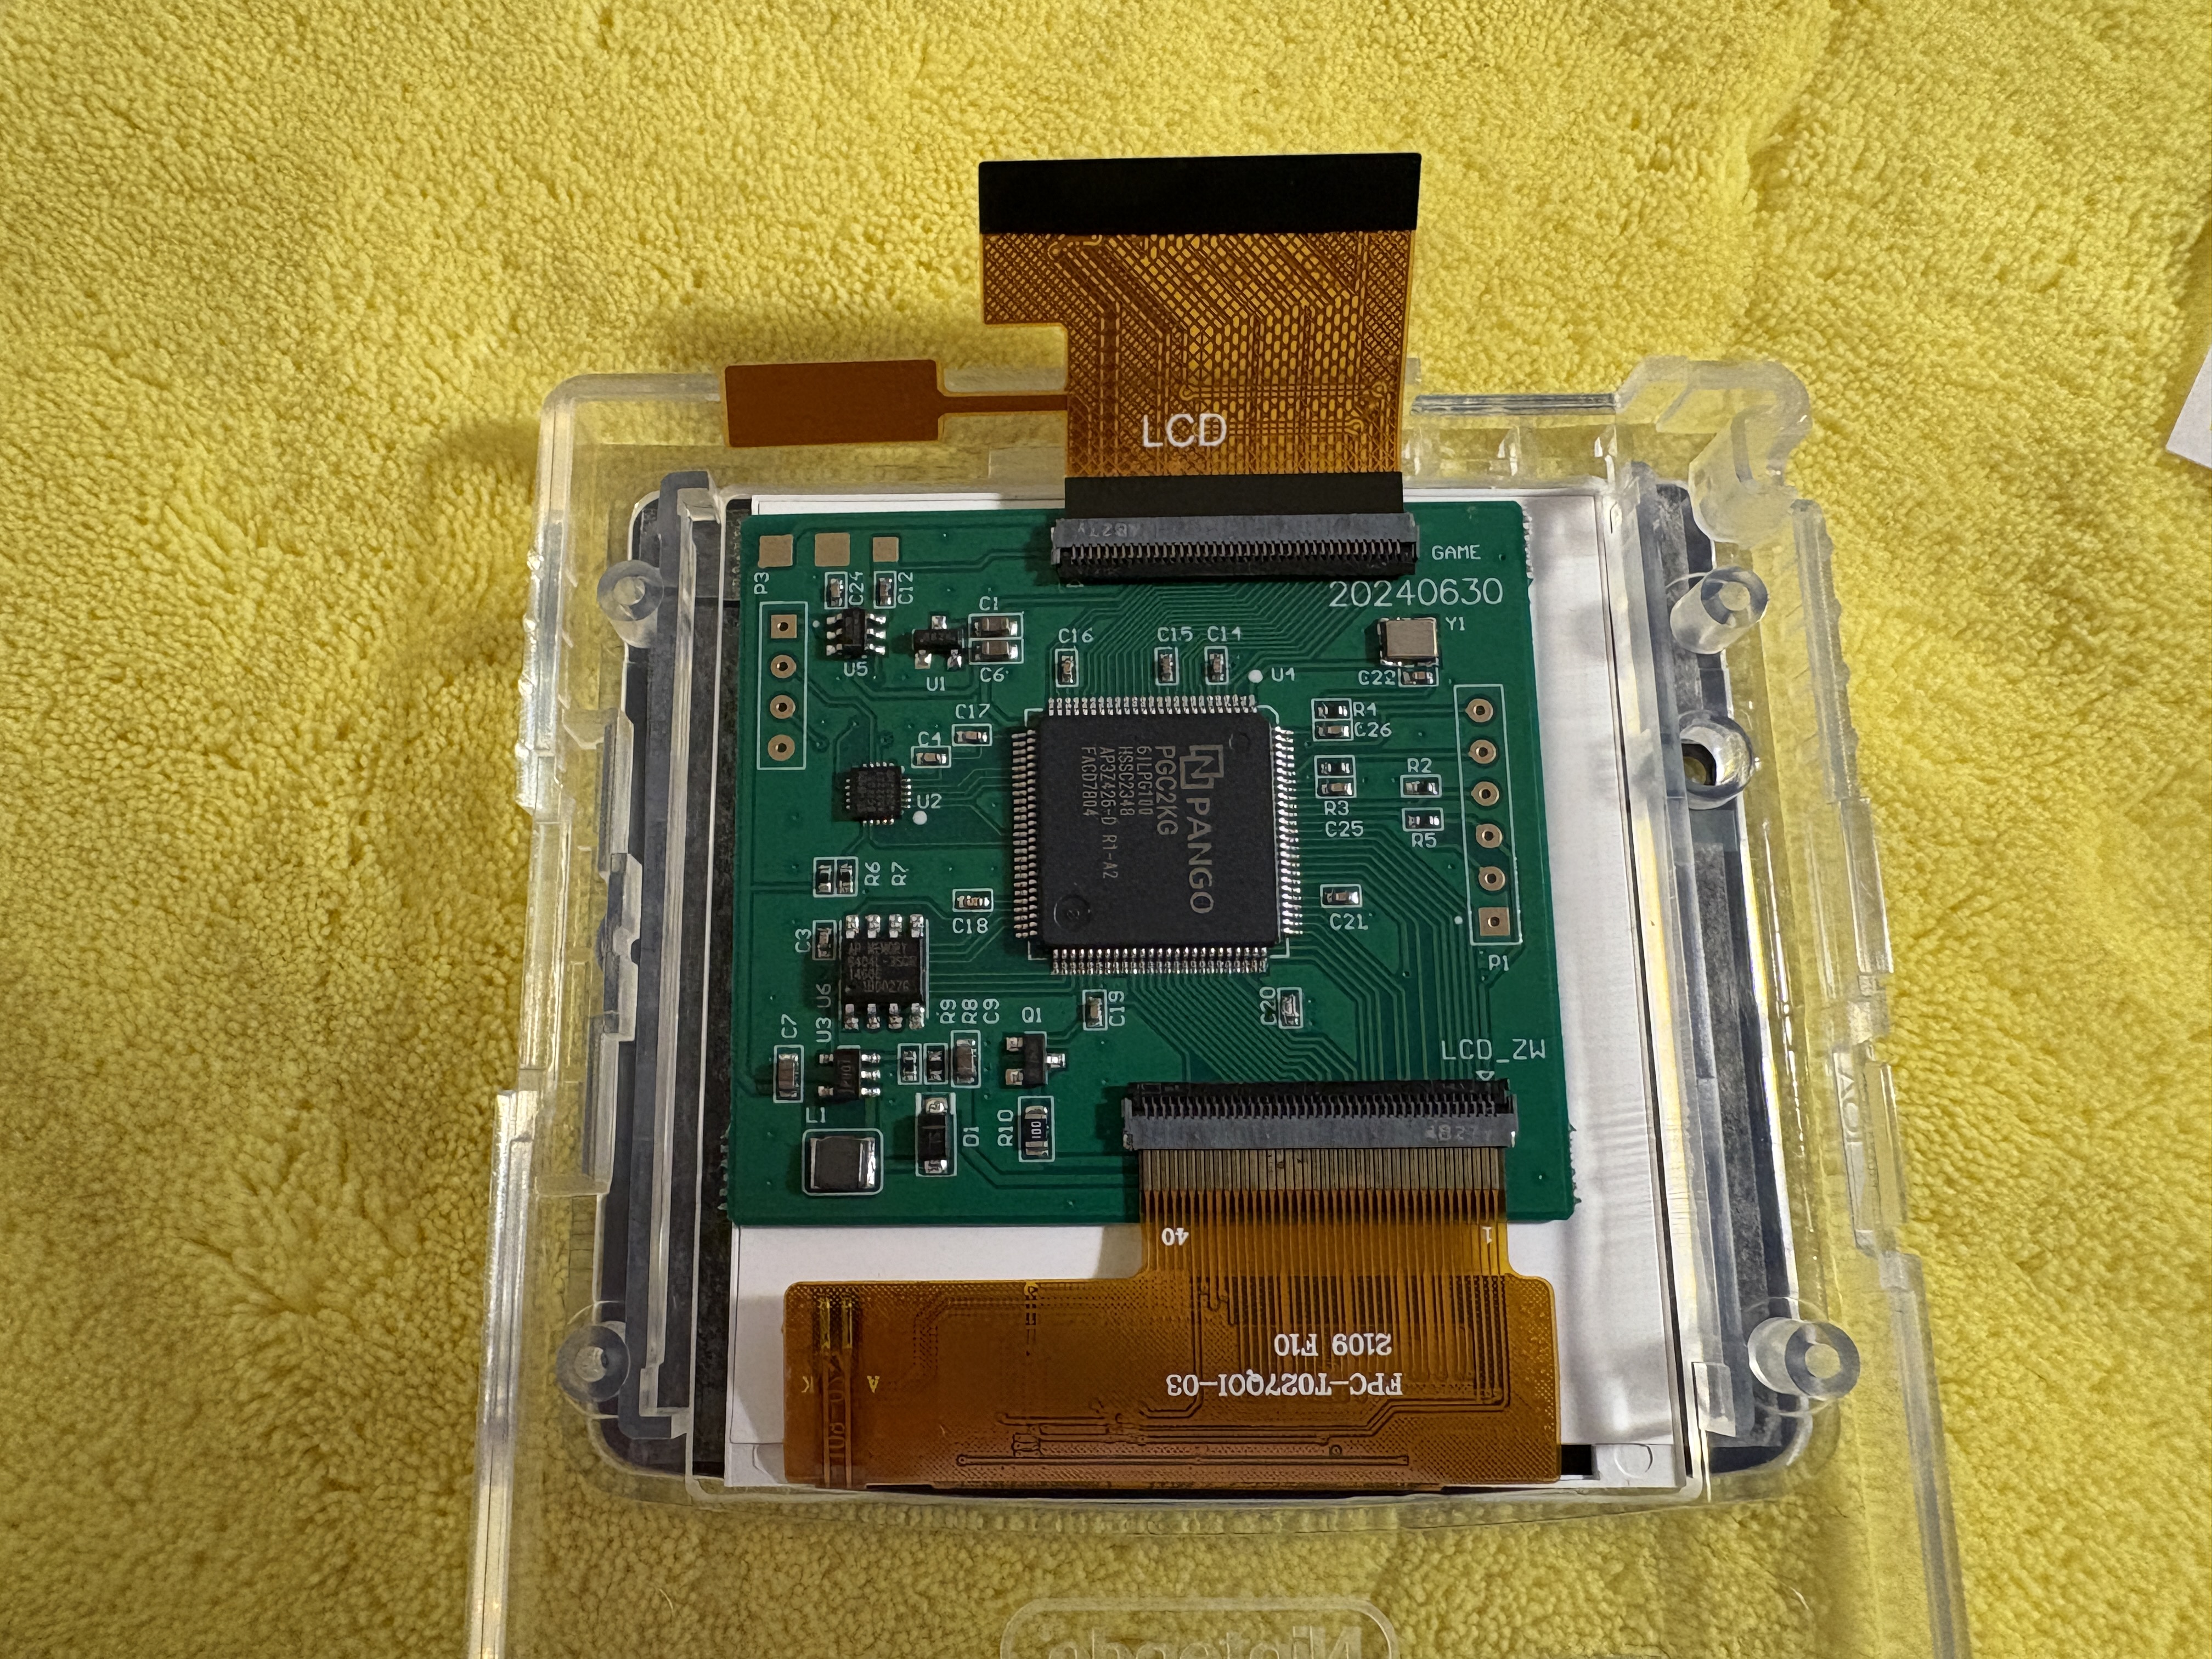
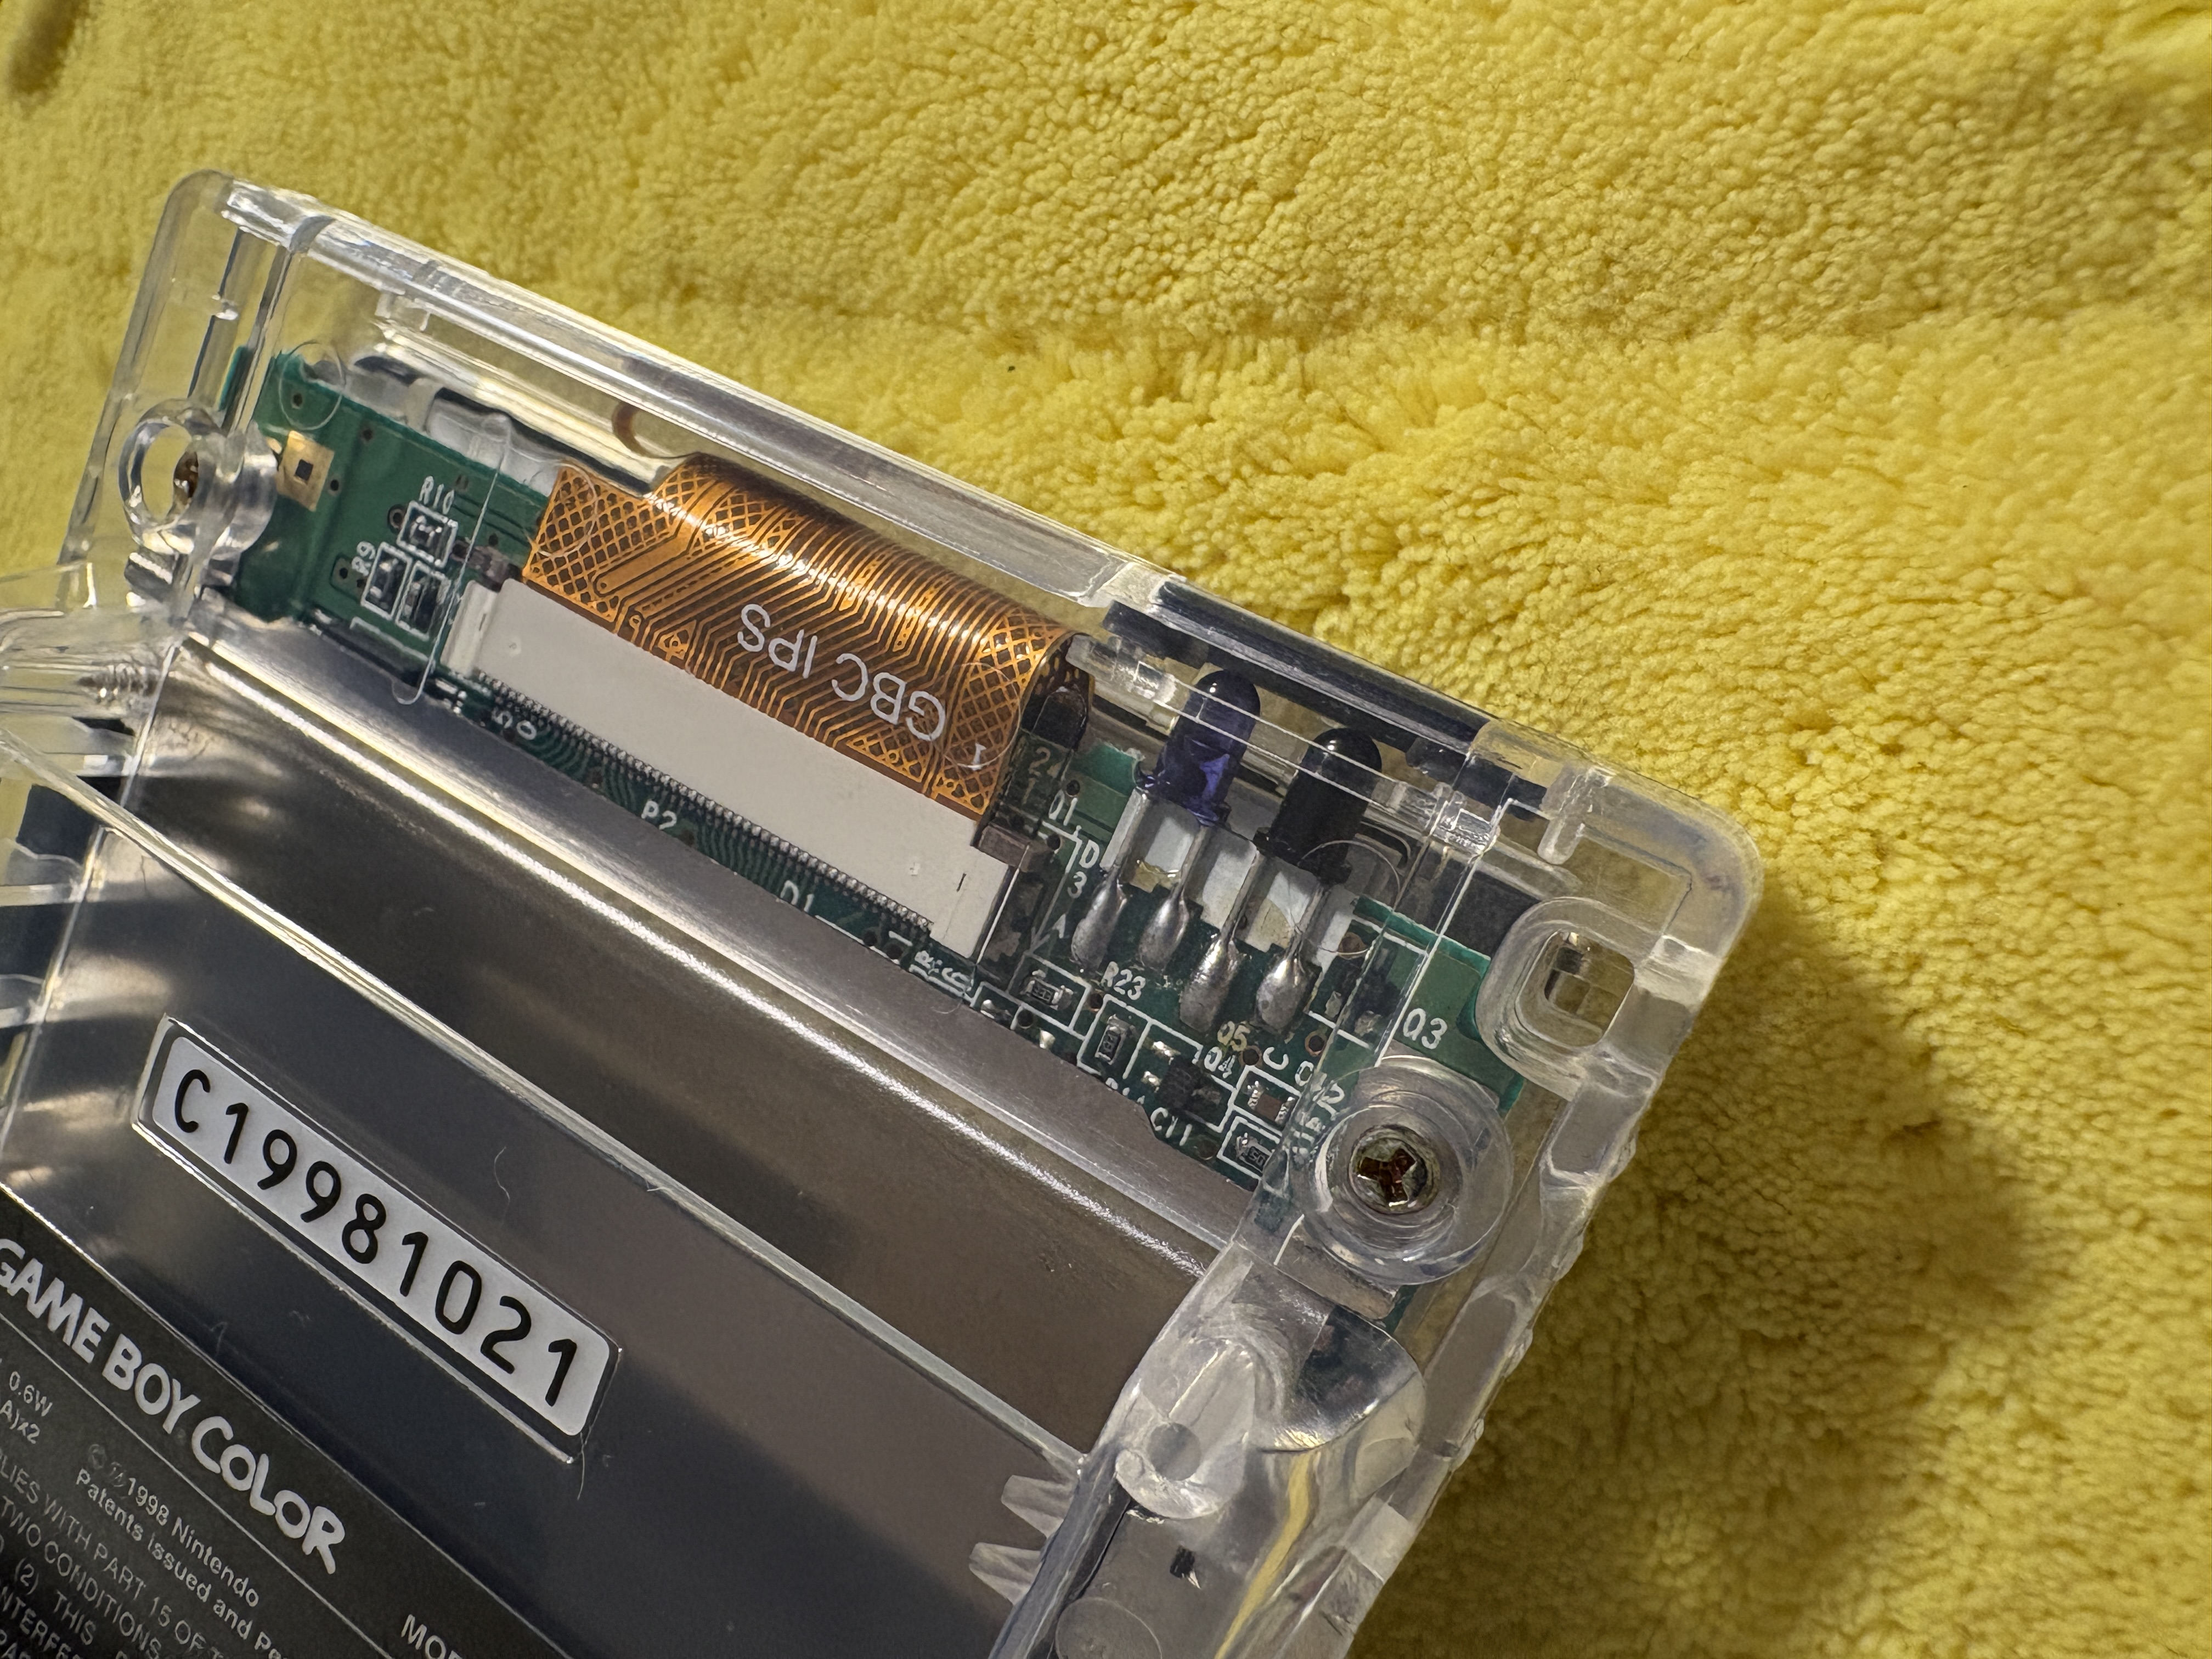
- Attach the ribbon cable of the IPS screen to the LCD connector on the motherboard. Ensure the gold edges face upward.
- Push the brown tab down to secure the cable.
- Attach the included chip with double-sided tape to the back of the screen. Ensure the touch sensor is in the correct position (against the inner top of the shell. If unclear, refer to the photo in Step 9).
Step 8: Install the Buttons
 For some reason, I always forget this step, but luckily you are reading this guide carefully and won’t skip it.
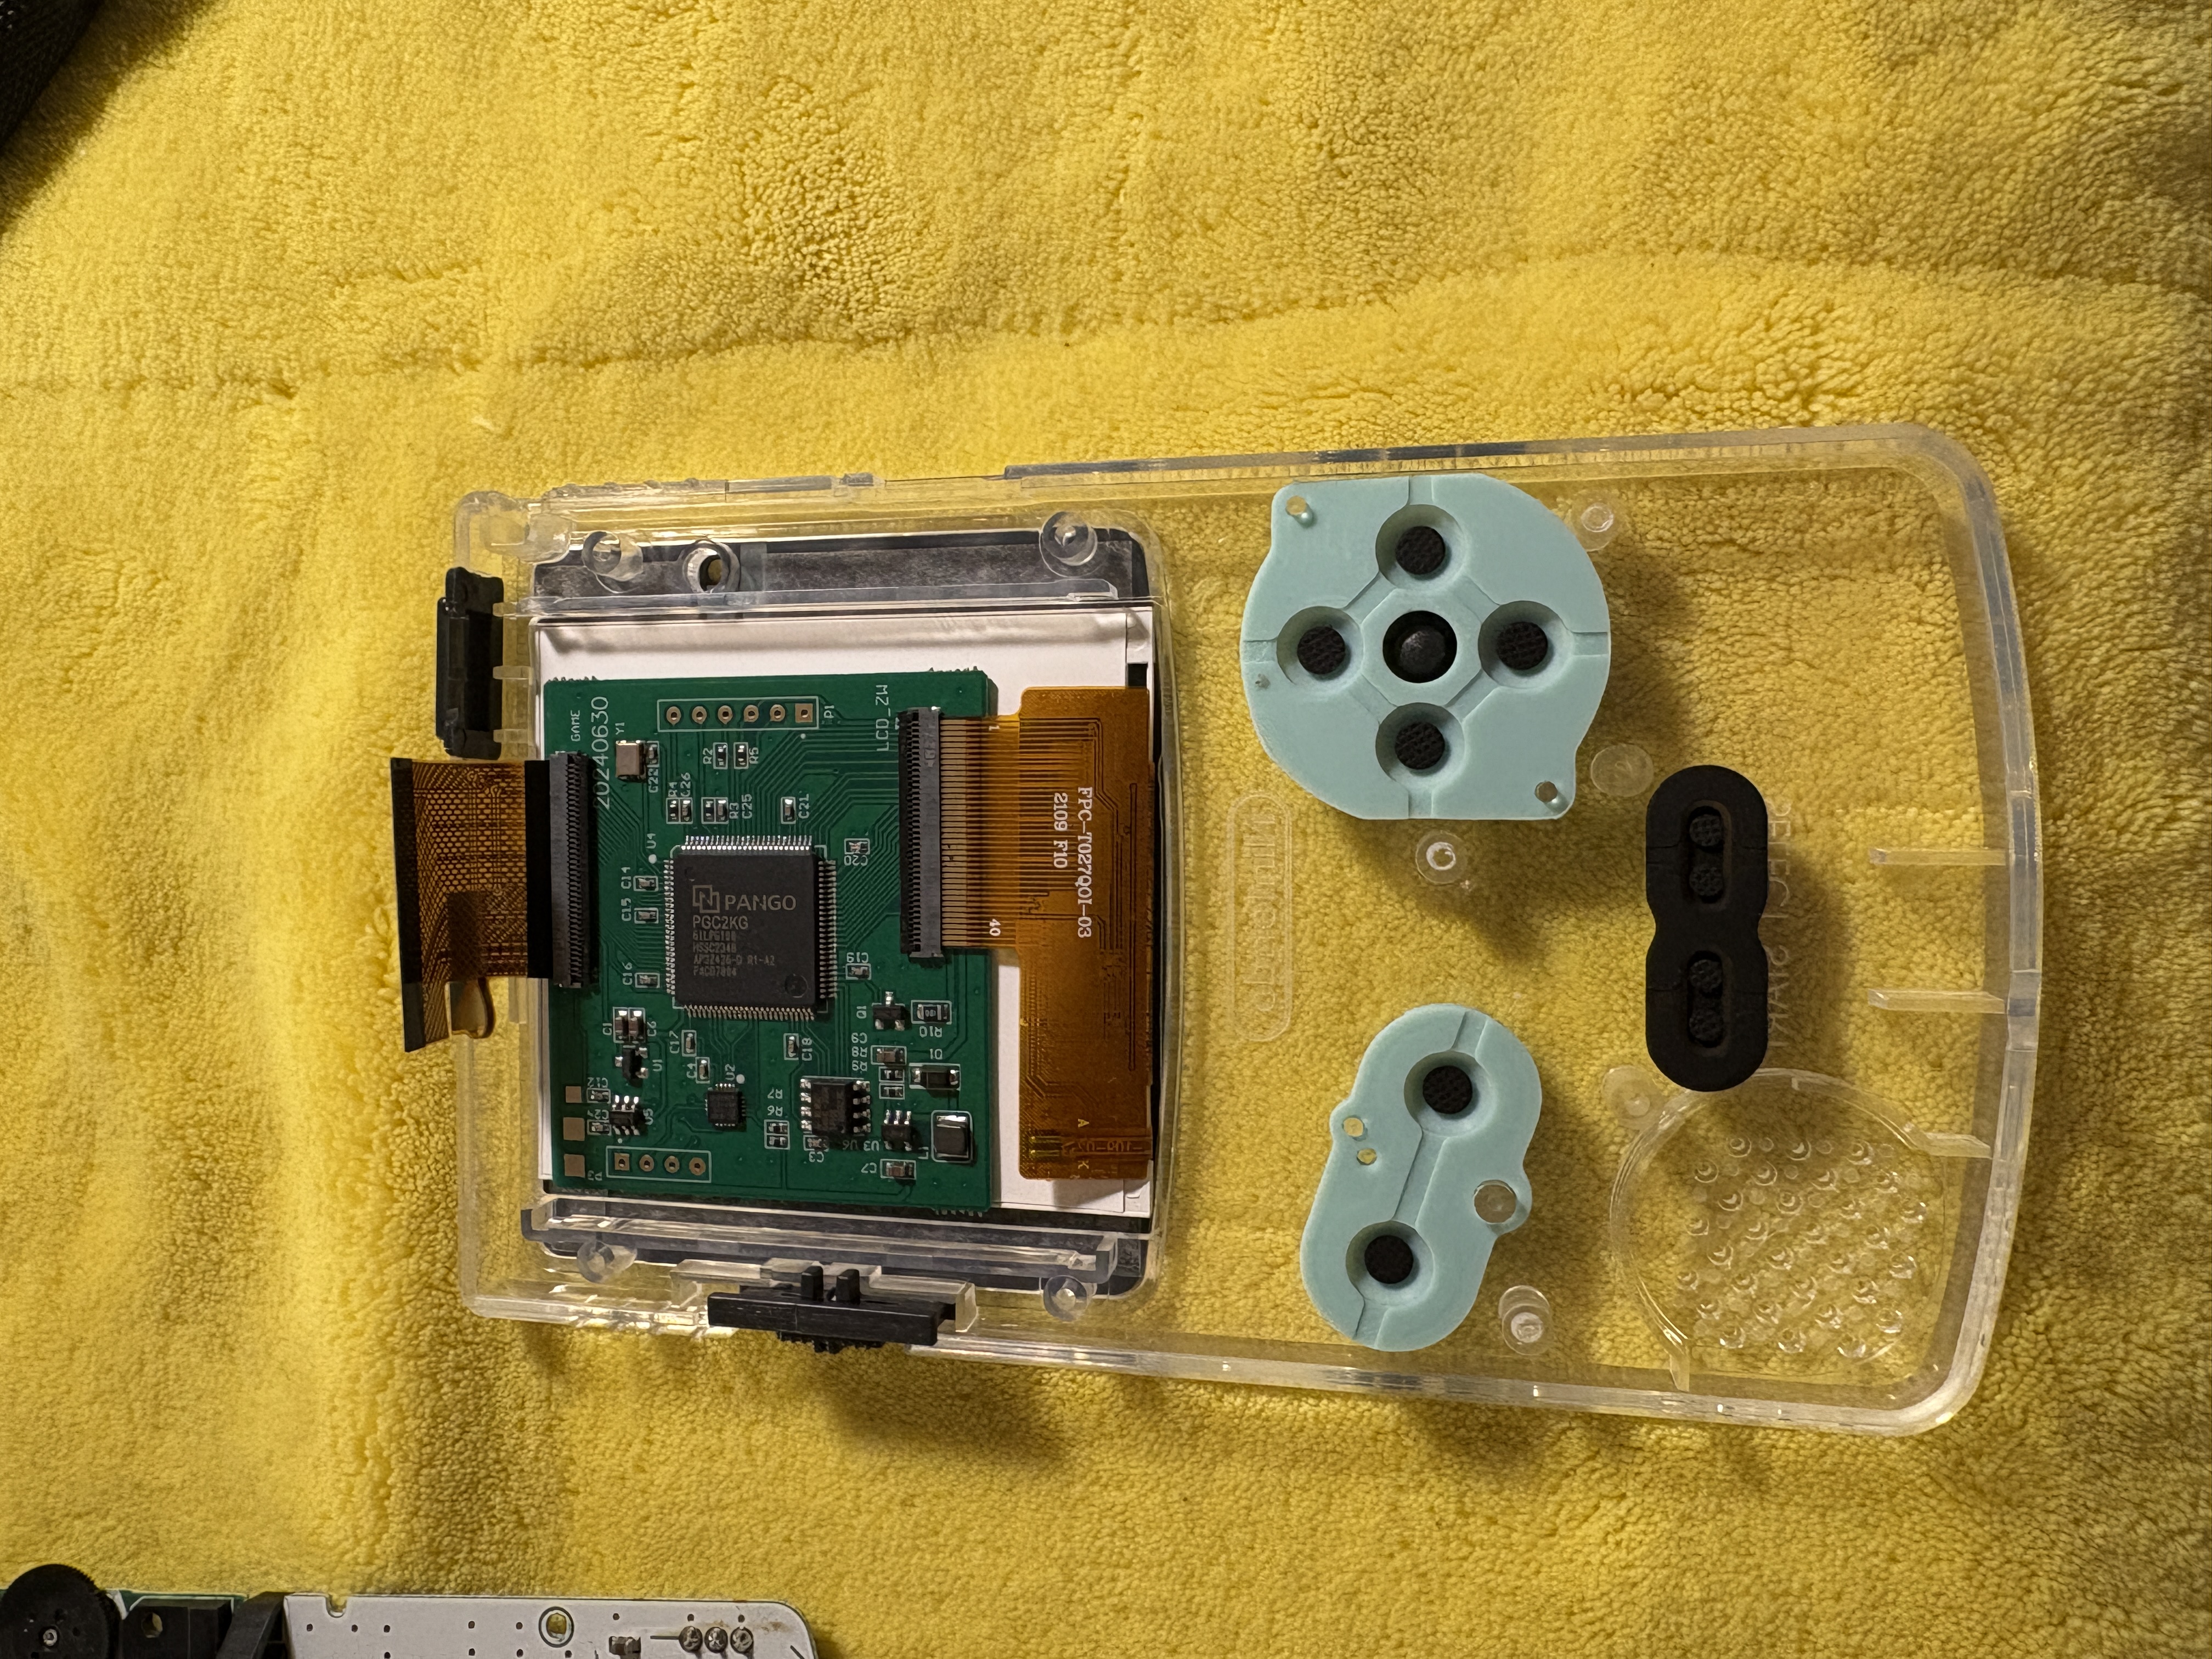
- Place the original buttons and membranes back into the new shell.
- Tip: The buttons only fit one way, so you can’t make mistakes.
- Don’t forget to replace the power switch and the IR protector at the top of the Game Boy.
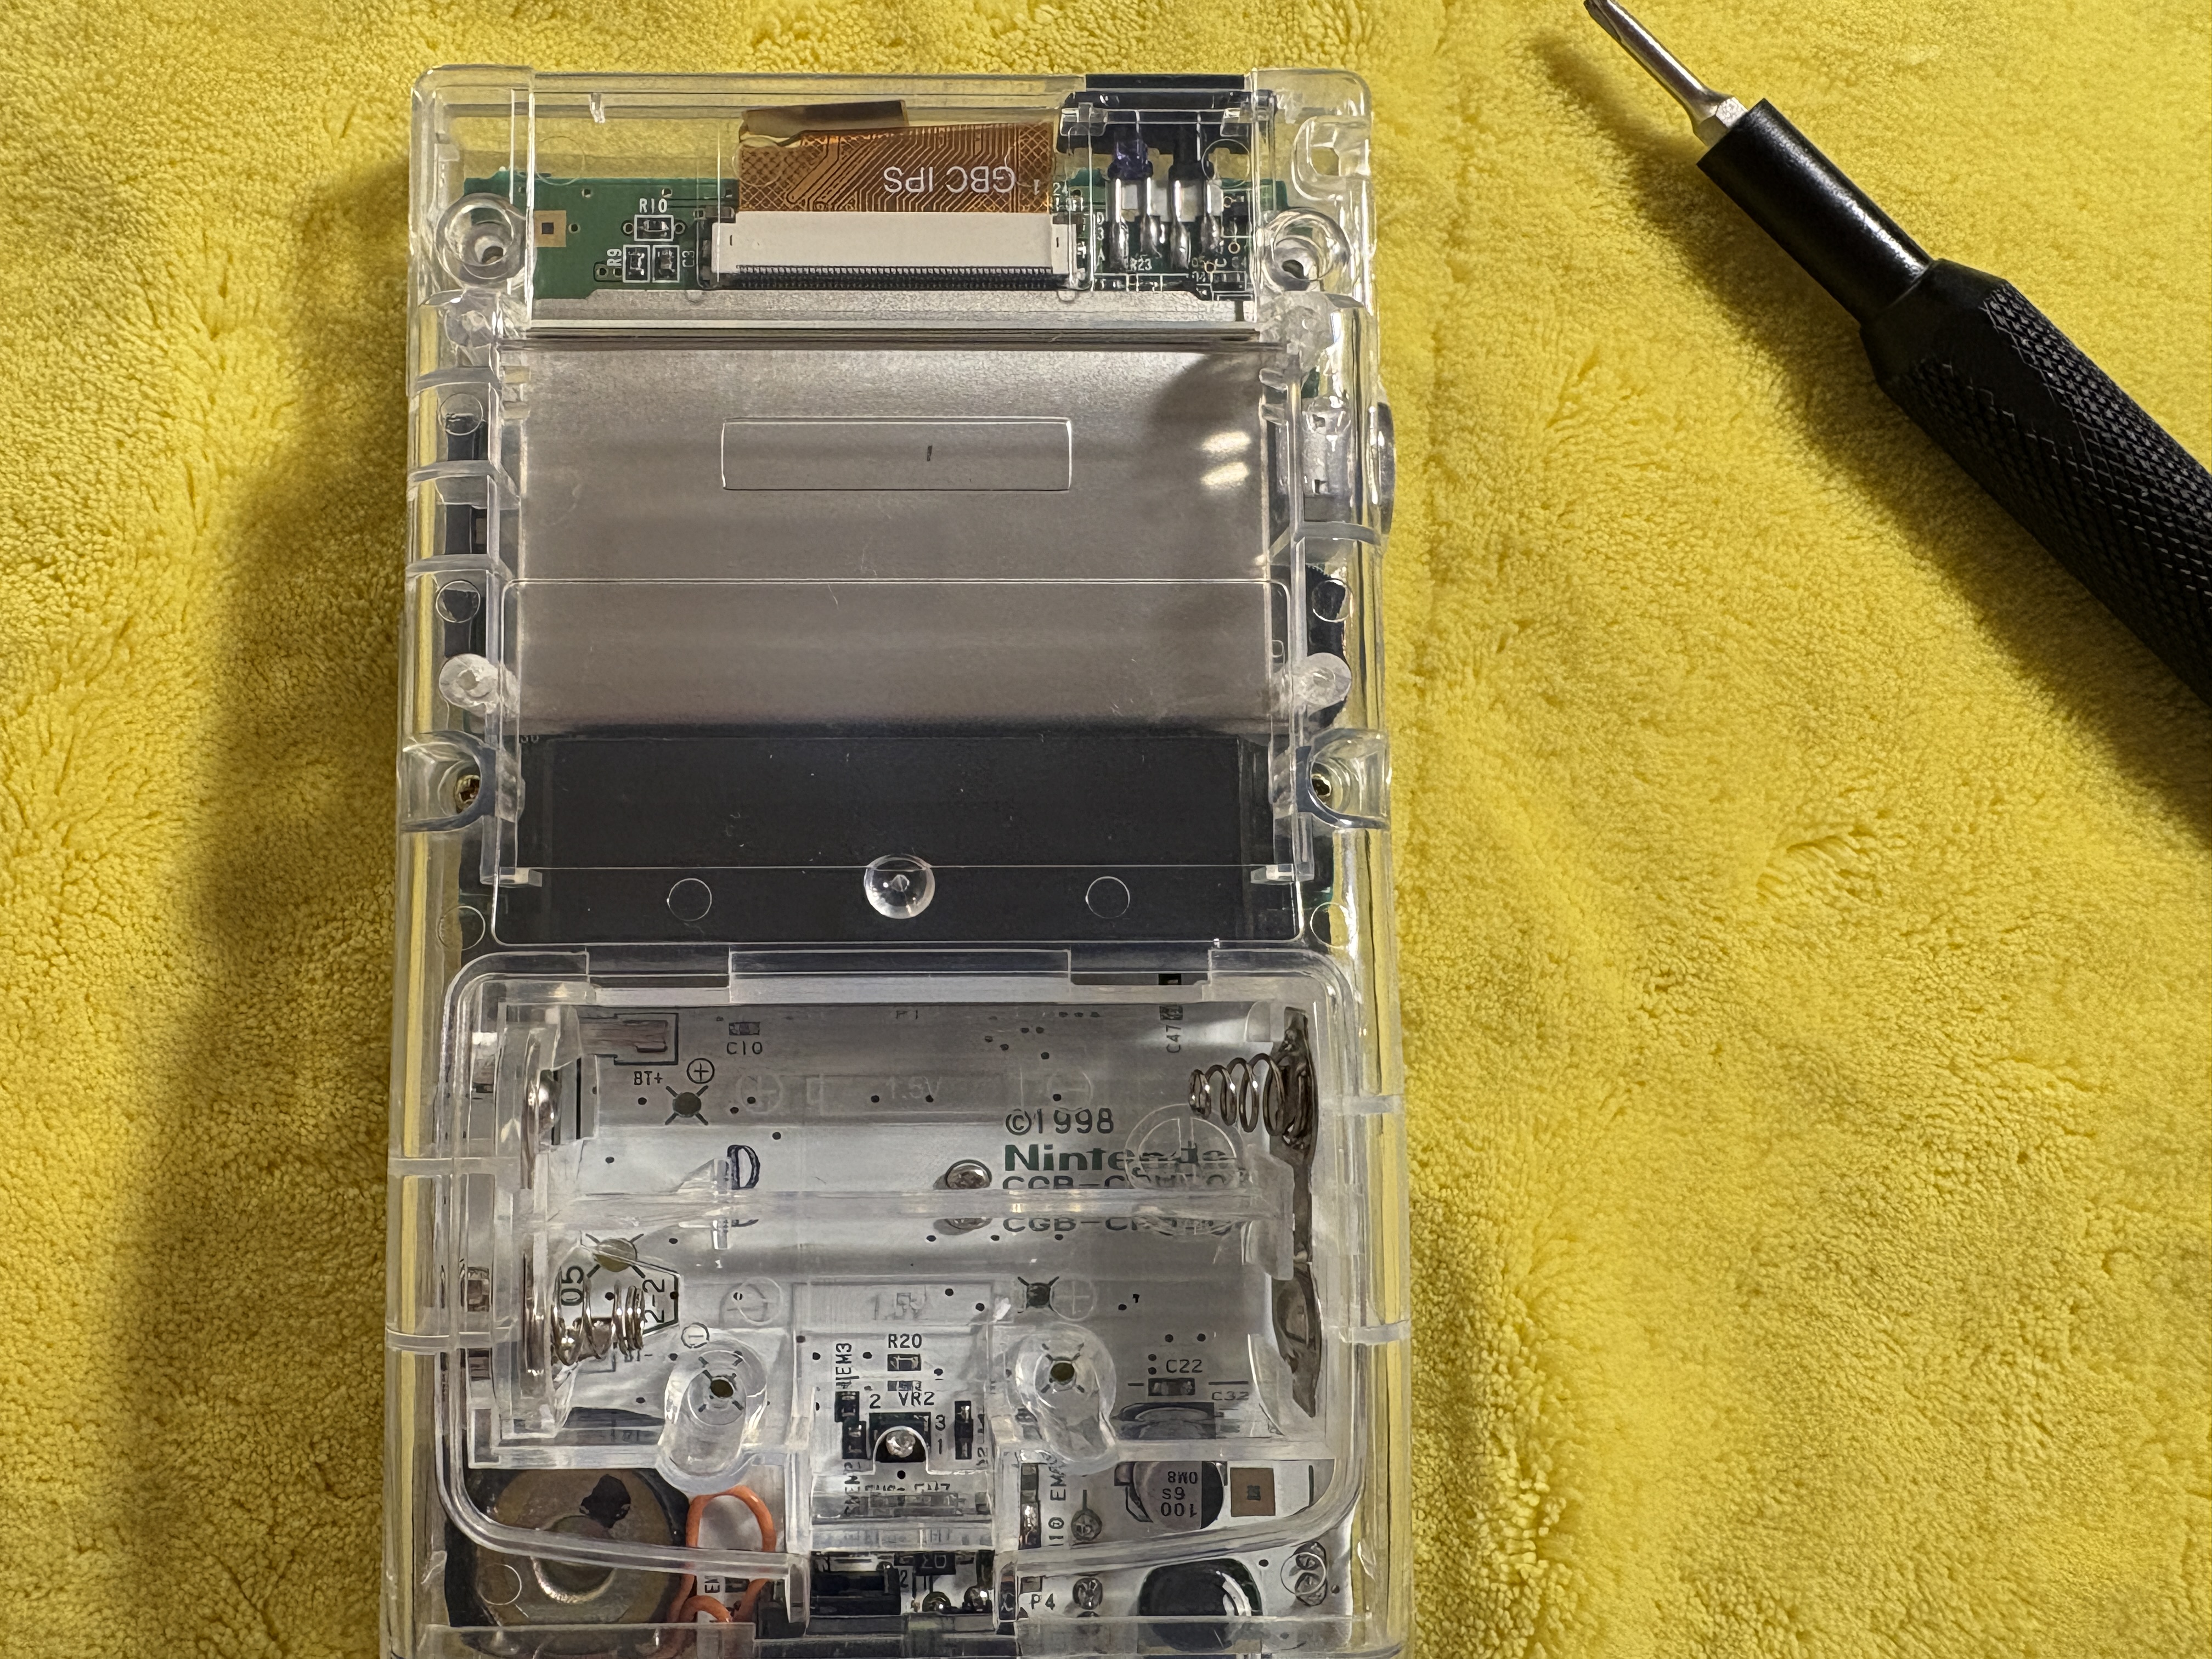
Step 9: Reinstall the Motherboard
- Place the motherboard back into the shell. Do not screw it down yet.
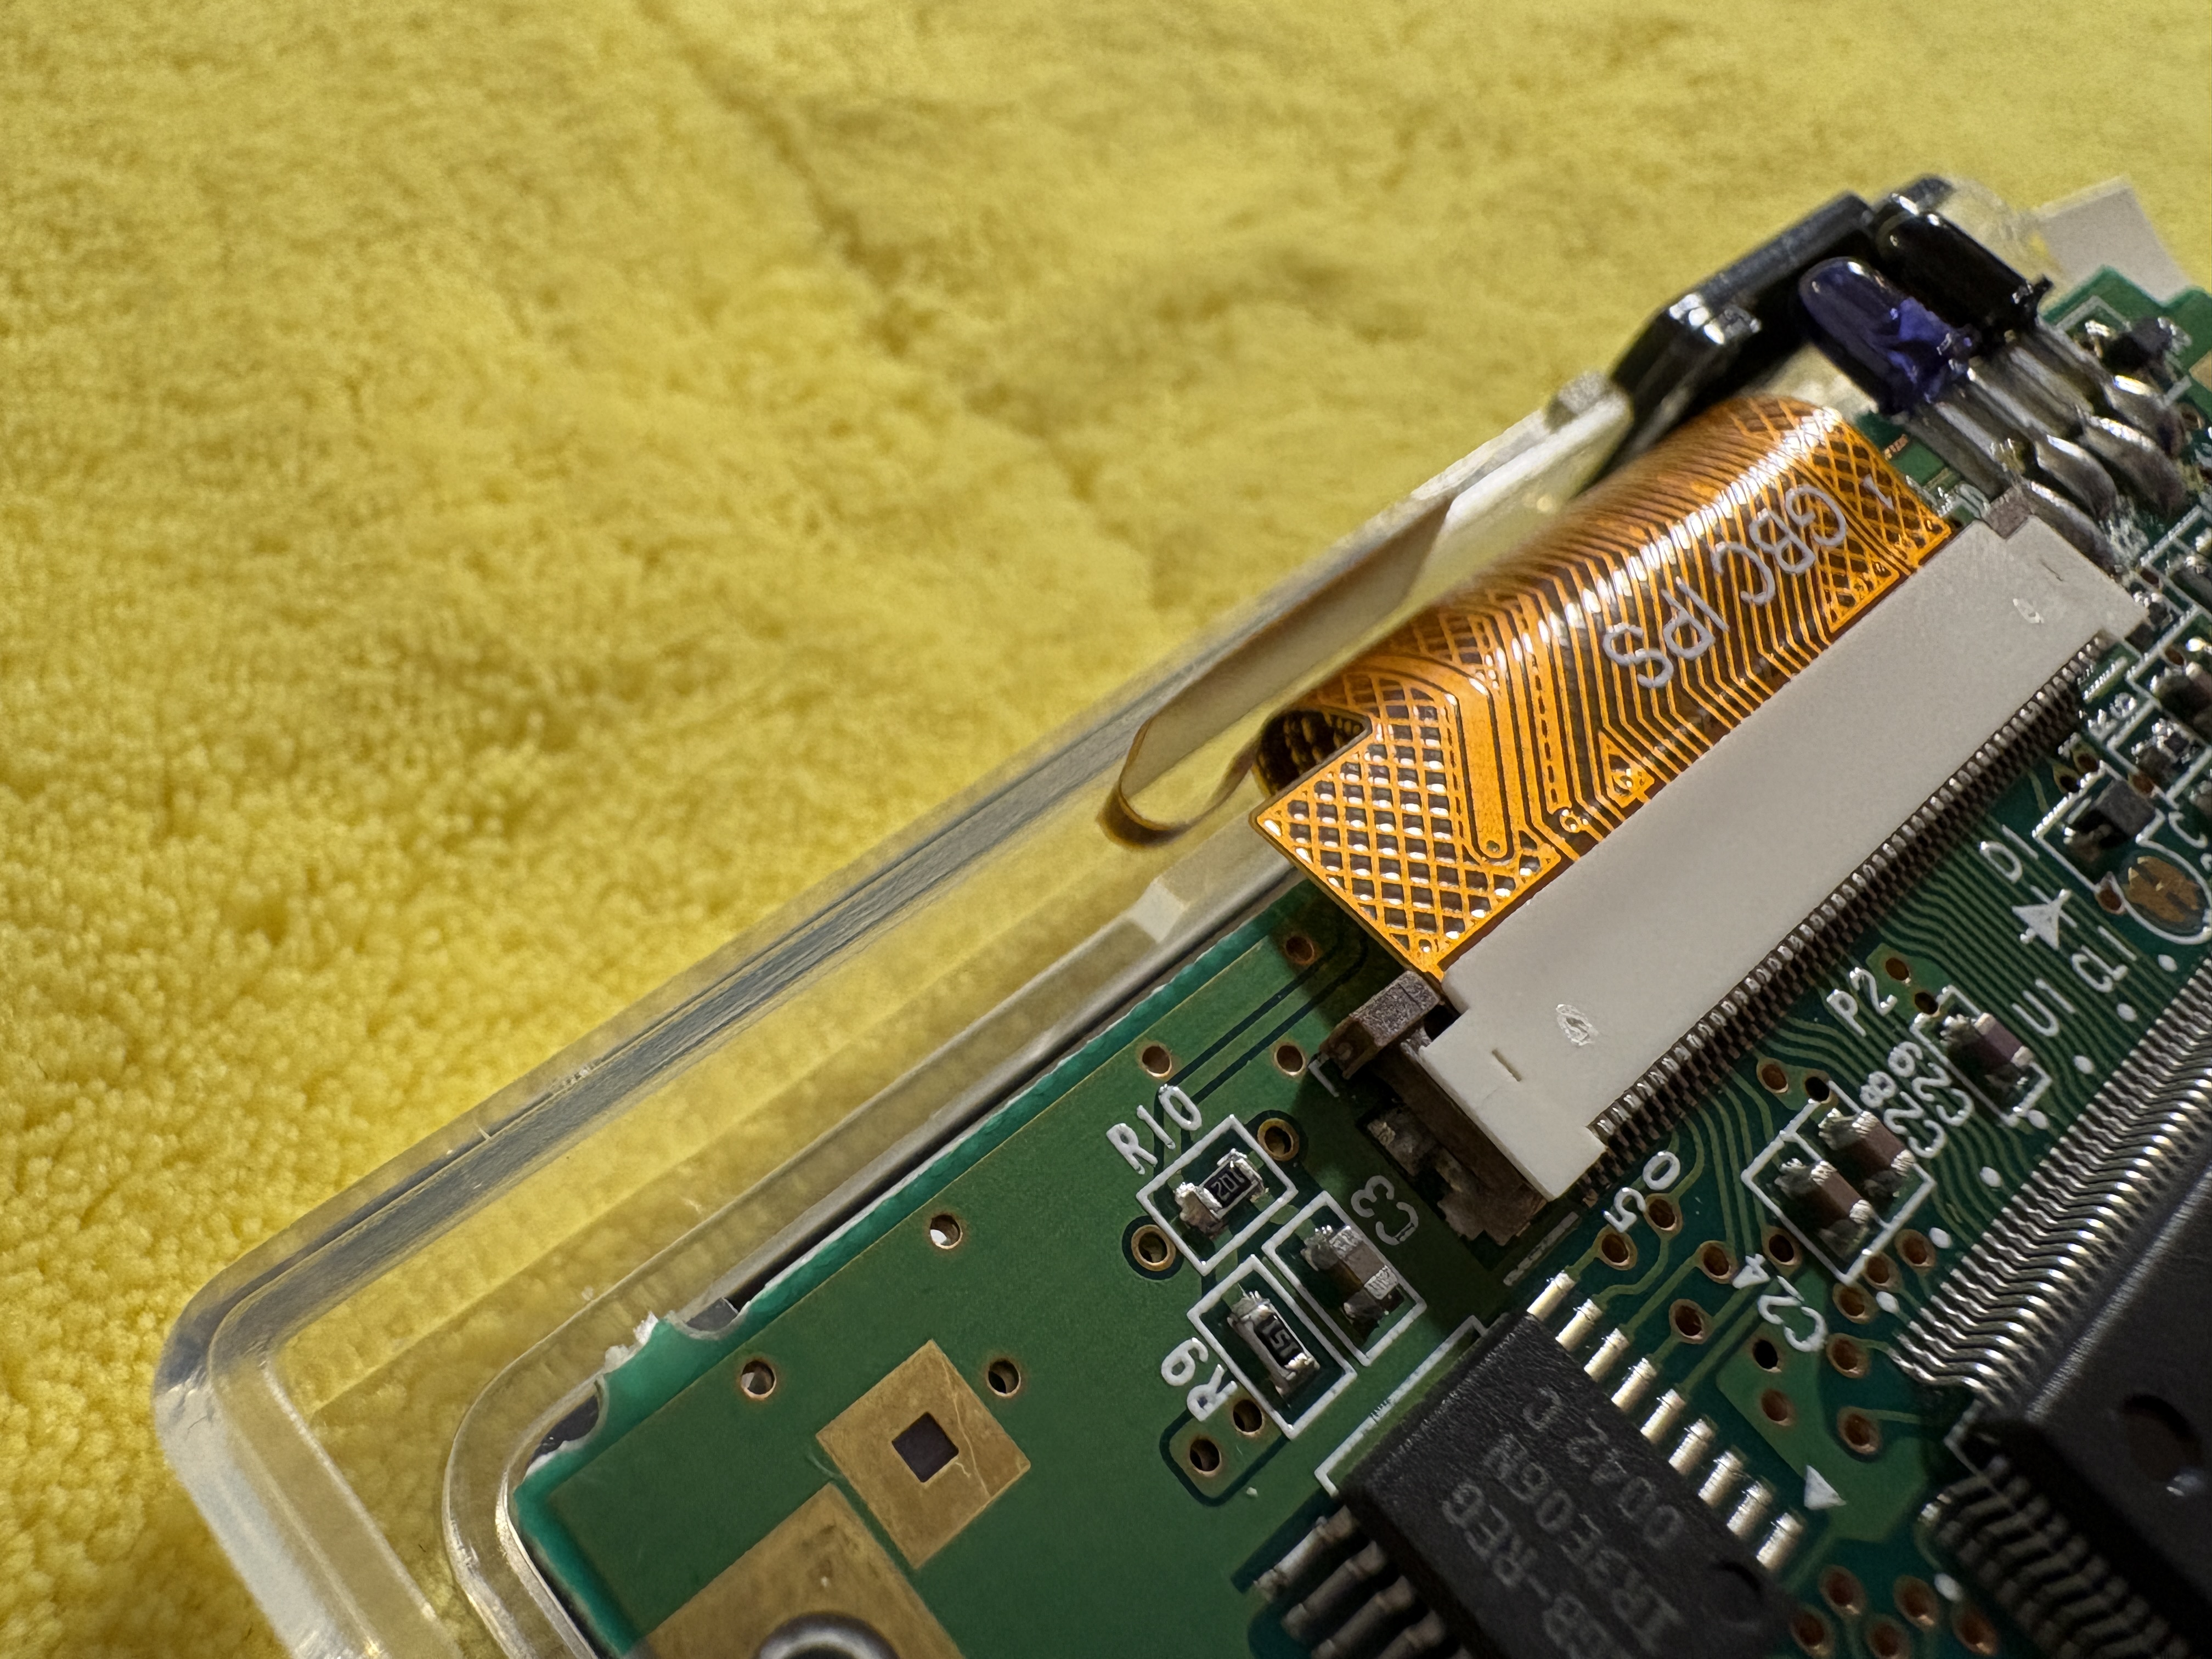
- Attach the ribbon cables to the motherboard and secure the tabs firmly.
- Screw the motherboard down with three screws: one left of the battery holder, one right, and one near the Nintendo logo.
- Place the speaker in its correct position.
Step 10: Prepare the Back Panel
- Install the metal backing plate into the new back panel of the shell using the included screws.
- Clean the inside of the back panel before assembly.
- This is also a good time to apply the stickers in their proper places.
Step 11: Close the Shell
- Attach the back panel to the shell.
- Secure it with the tri-wing screws.
- Tip: Again, use an X or zigzag pattern and gently tighten the screws.
Step 12: The Battery Compartment
- Install the included metal element into the battery compartment.
- Tip: Ensure the spring is positioned at the top.
Step 13: Test Your New Game Boy

- Reinsert the batteries.
- Insert a game cartridge and turn on the Game Boy.
- Check the screen. Use the touch sensor to adjust brightness and colors.
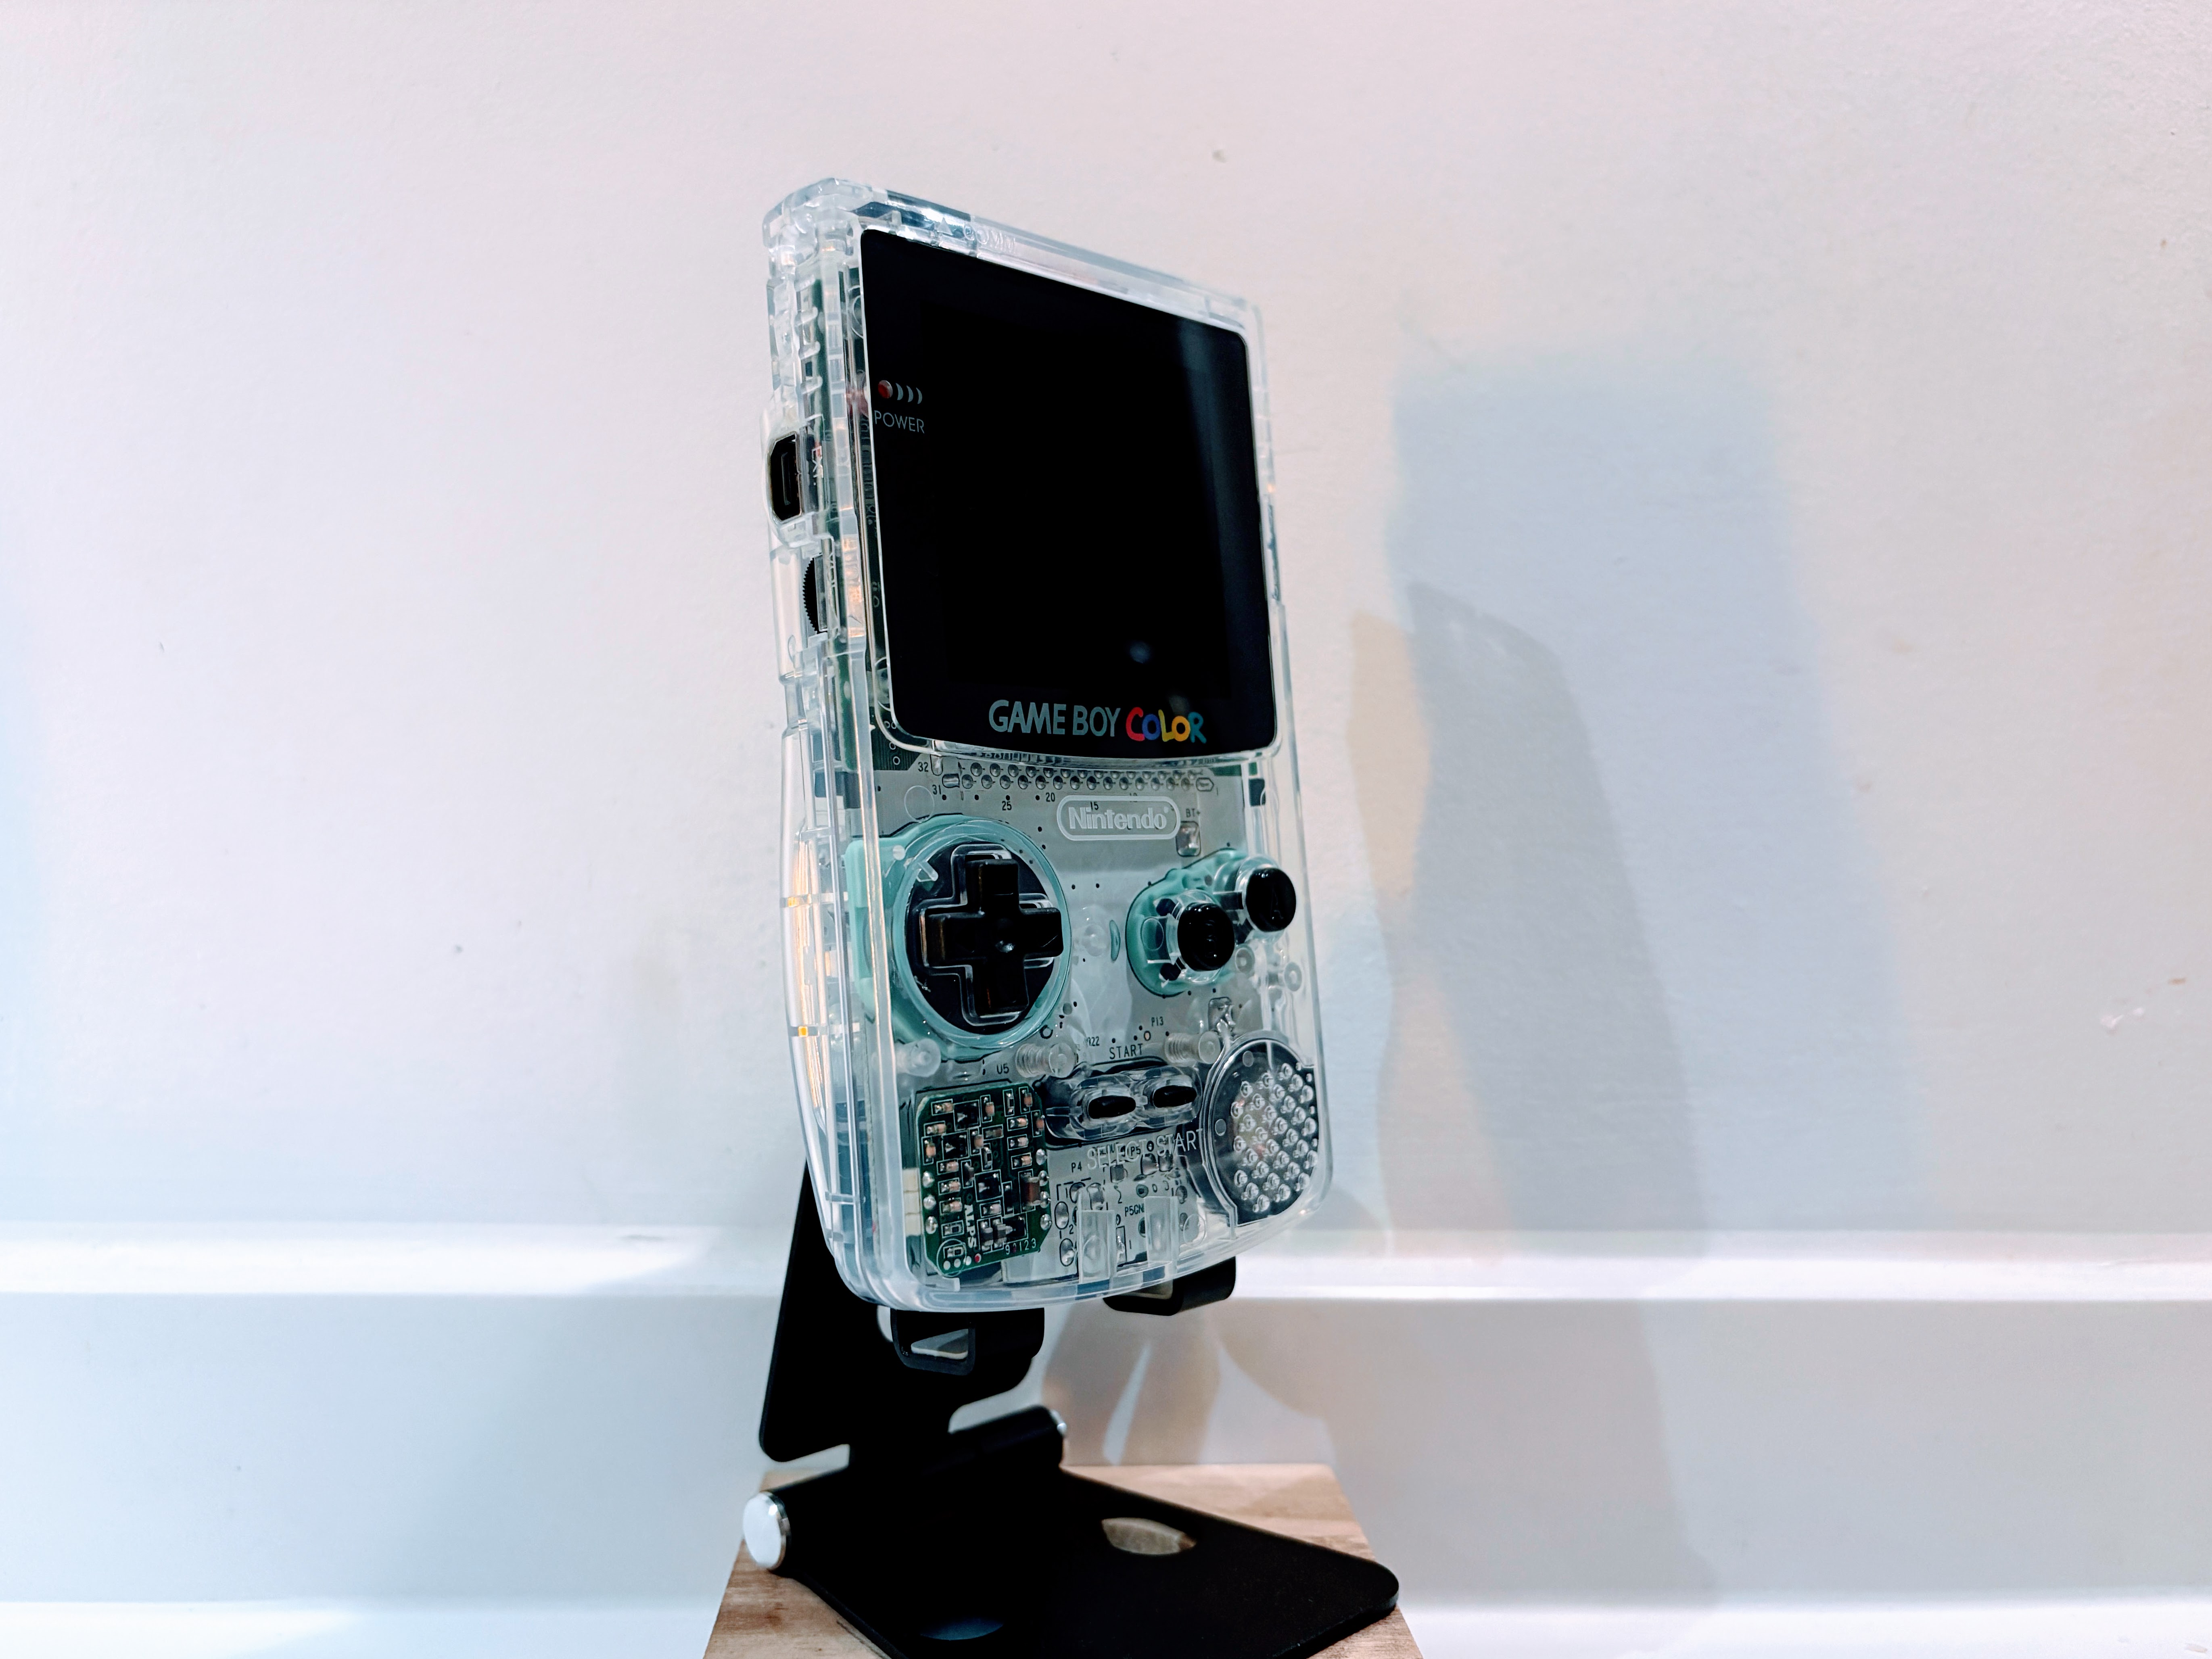
Result
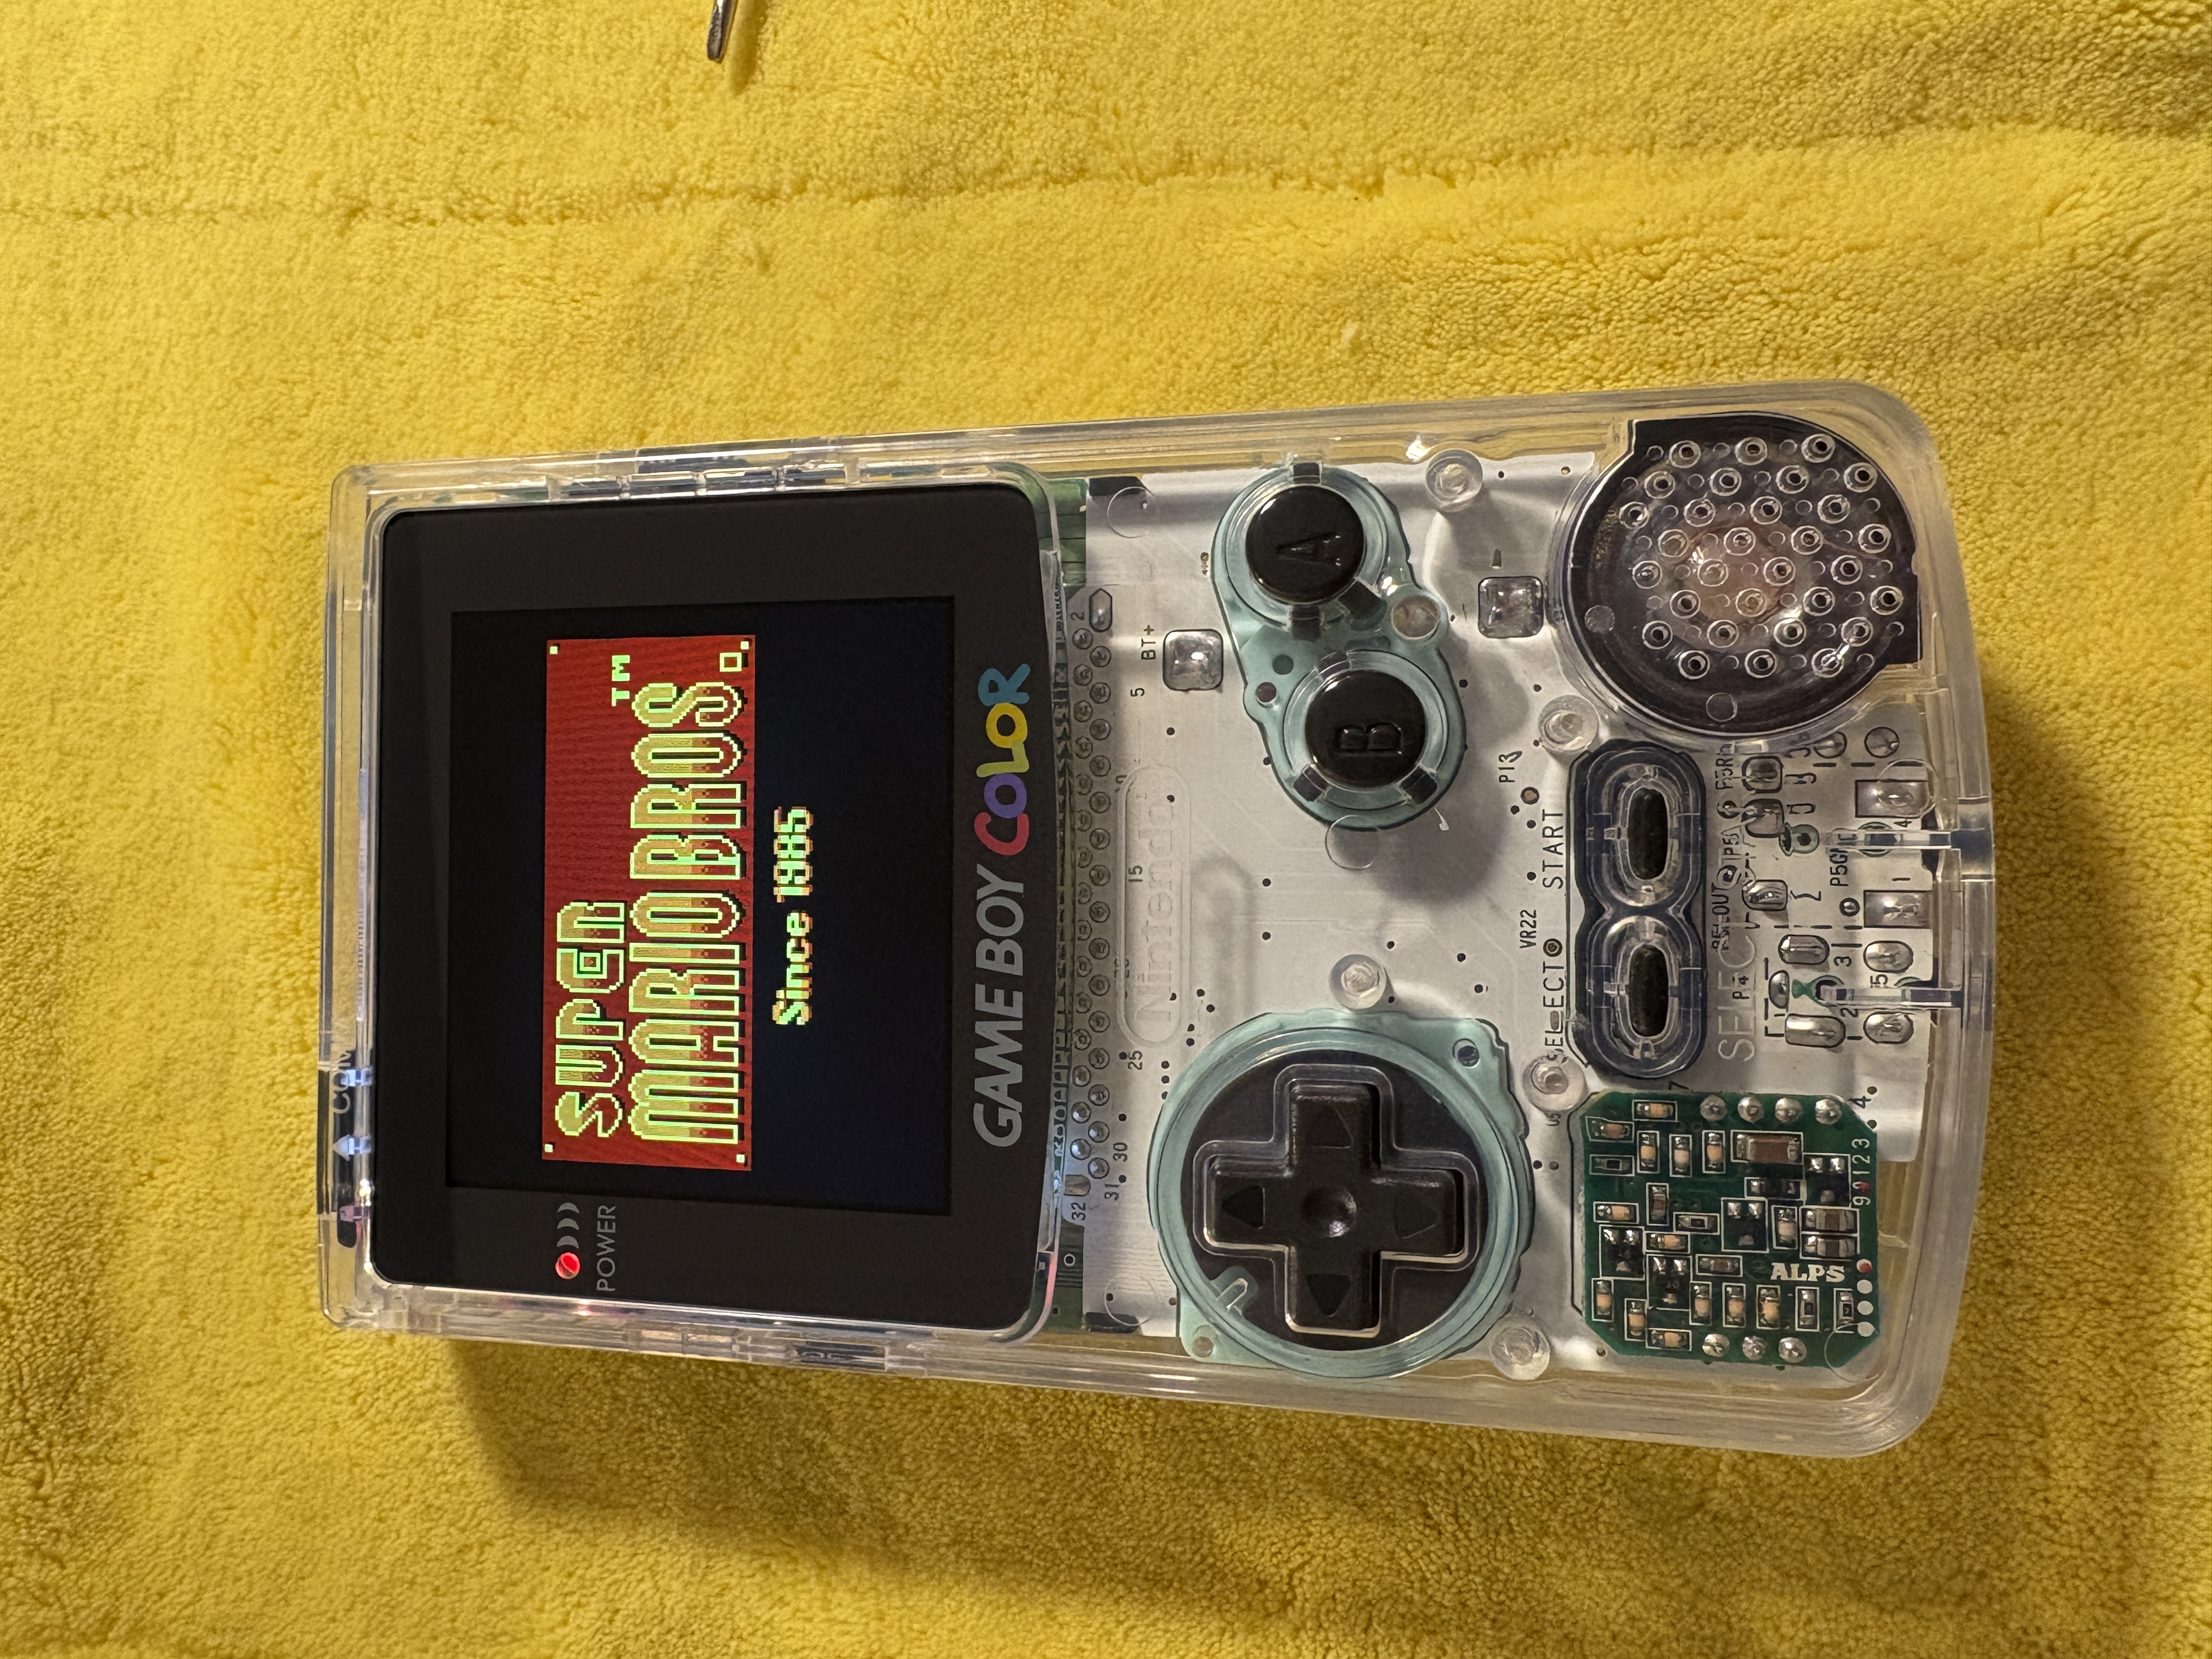 Your Game Boy Color now looks amazing and features a modern screen with adjustable brightness. The transparent design and vibrant colors give a nostalgic console a fresh, new look. Enjoy your modded Game Boy Color!
If this post helped you, I’d greatly appreciate it if you shared it with friends or acquaintances. And if you’re looking for a modded GBC, GBP, SNES, or another retro device, check out my webshop retrogear.nl.
-XXX-
Jorne
![]()